Big Hair at Birka

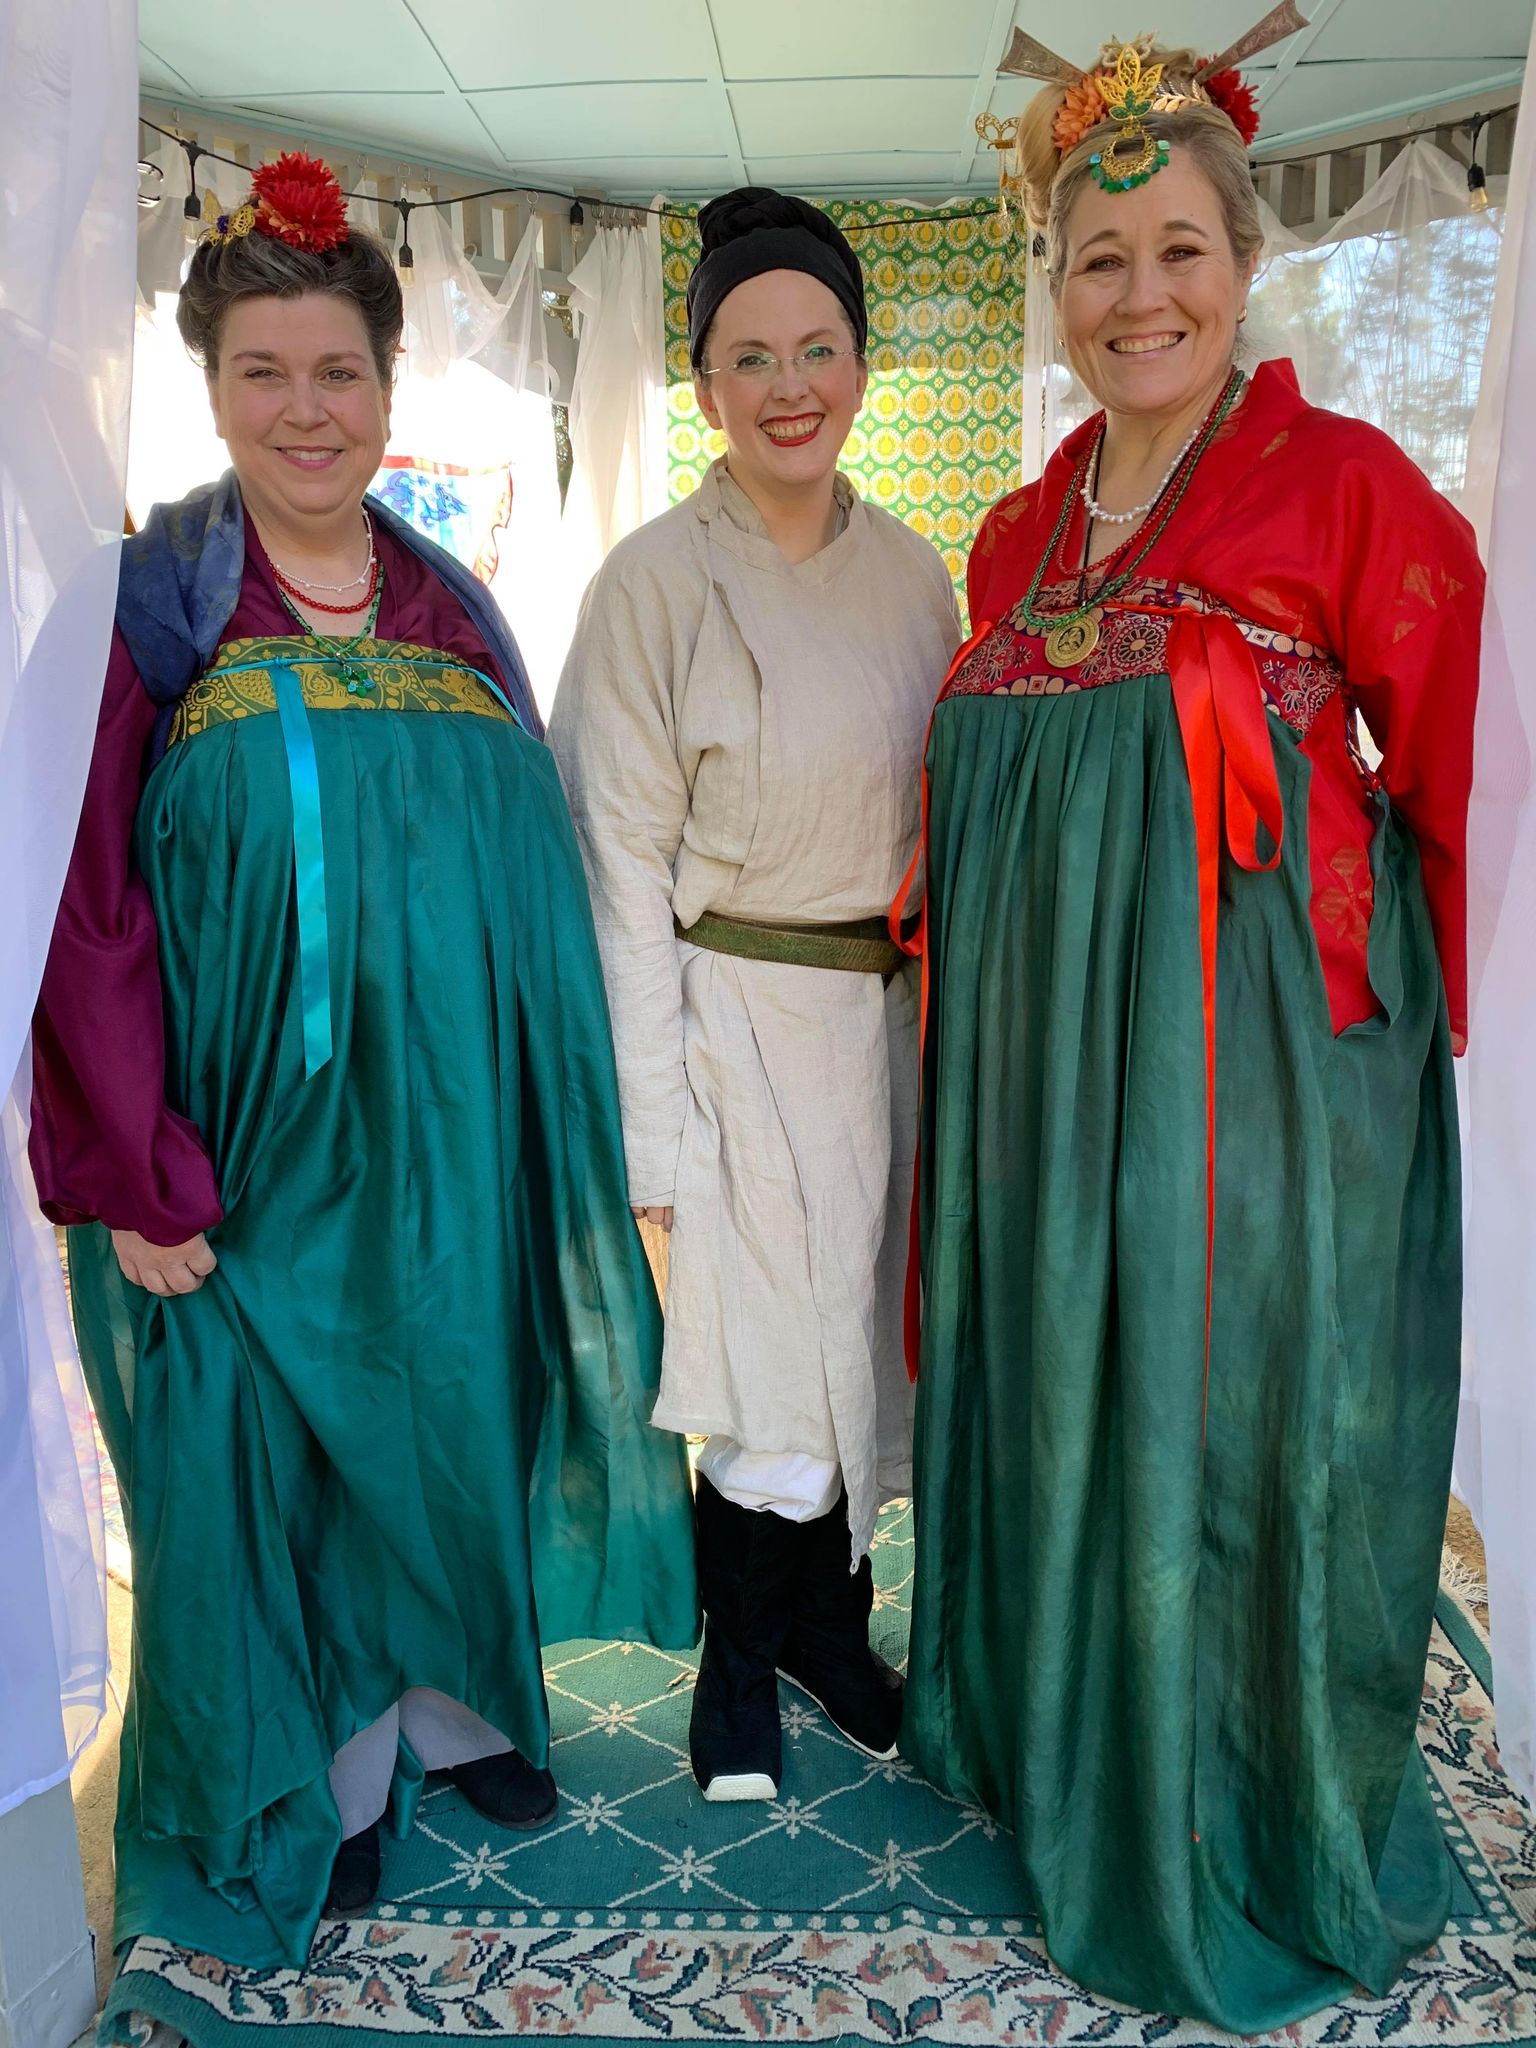
My first event here in the East Kingdom was A Market Day at Birka in January 2023. Once I decided to go, I knew I had to do something to make a little bit of a splash, if only for my own brain – a sort of arrival moment, not unlike Vivacious.

Drag Queen Vivacious, wearing a green jacket with a tall headpiece entering the workroom of RuPaul's Drag Race. The caption reads "Mother has arrived."
Drag Queen Vivacious entering the workroom of RuPaul’s Drag Race.

Quick note: WordPress didn’t want to play nice with images, so all my process photos are in a slideshow toward the end of the post.

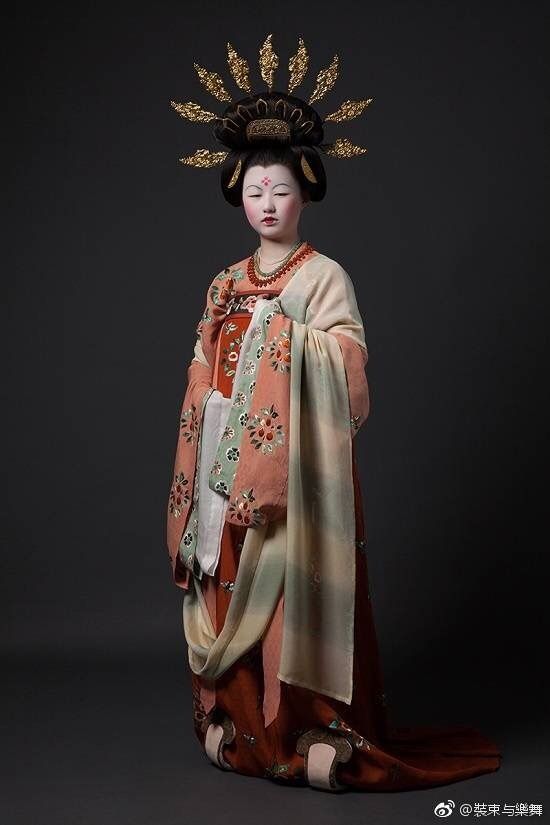
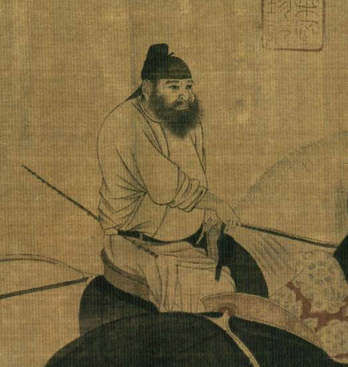
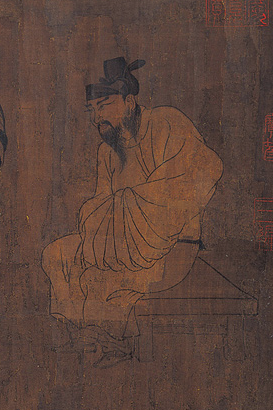
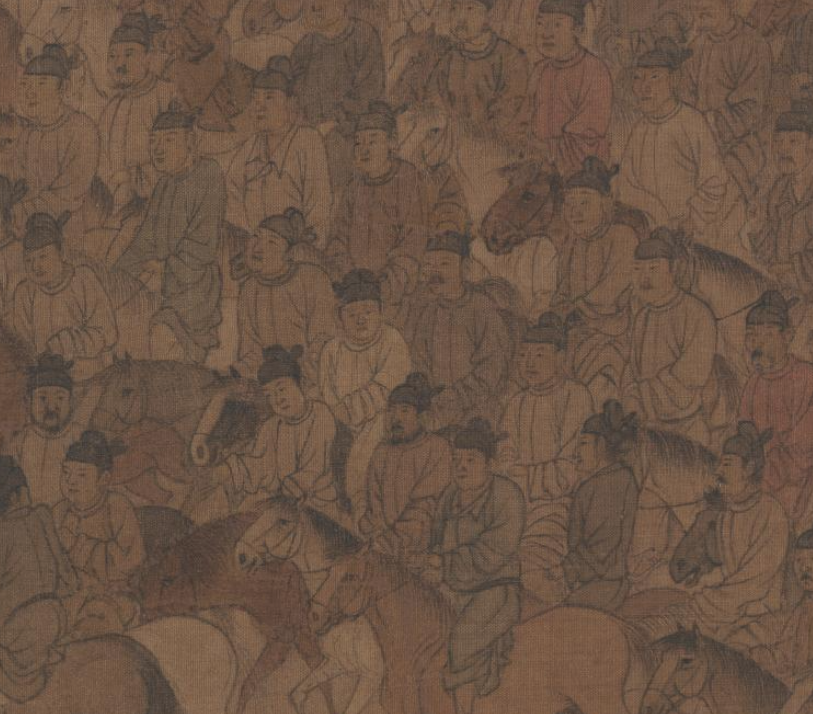
I’d been watching Rise of the Phoenixes again and was falling in love with big hair. Inspired, I dug back through my notes and scanned pages of old inter-library loans and landed on this representation of a carving on Princess Yongtai’s tomb1.

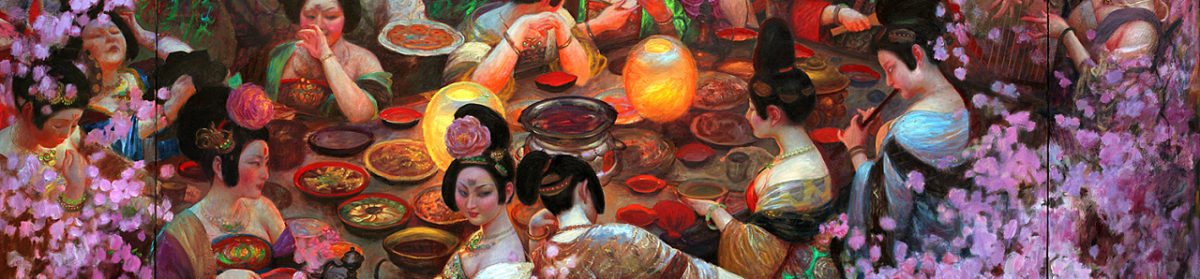
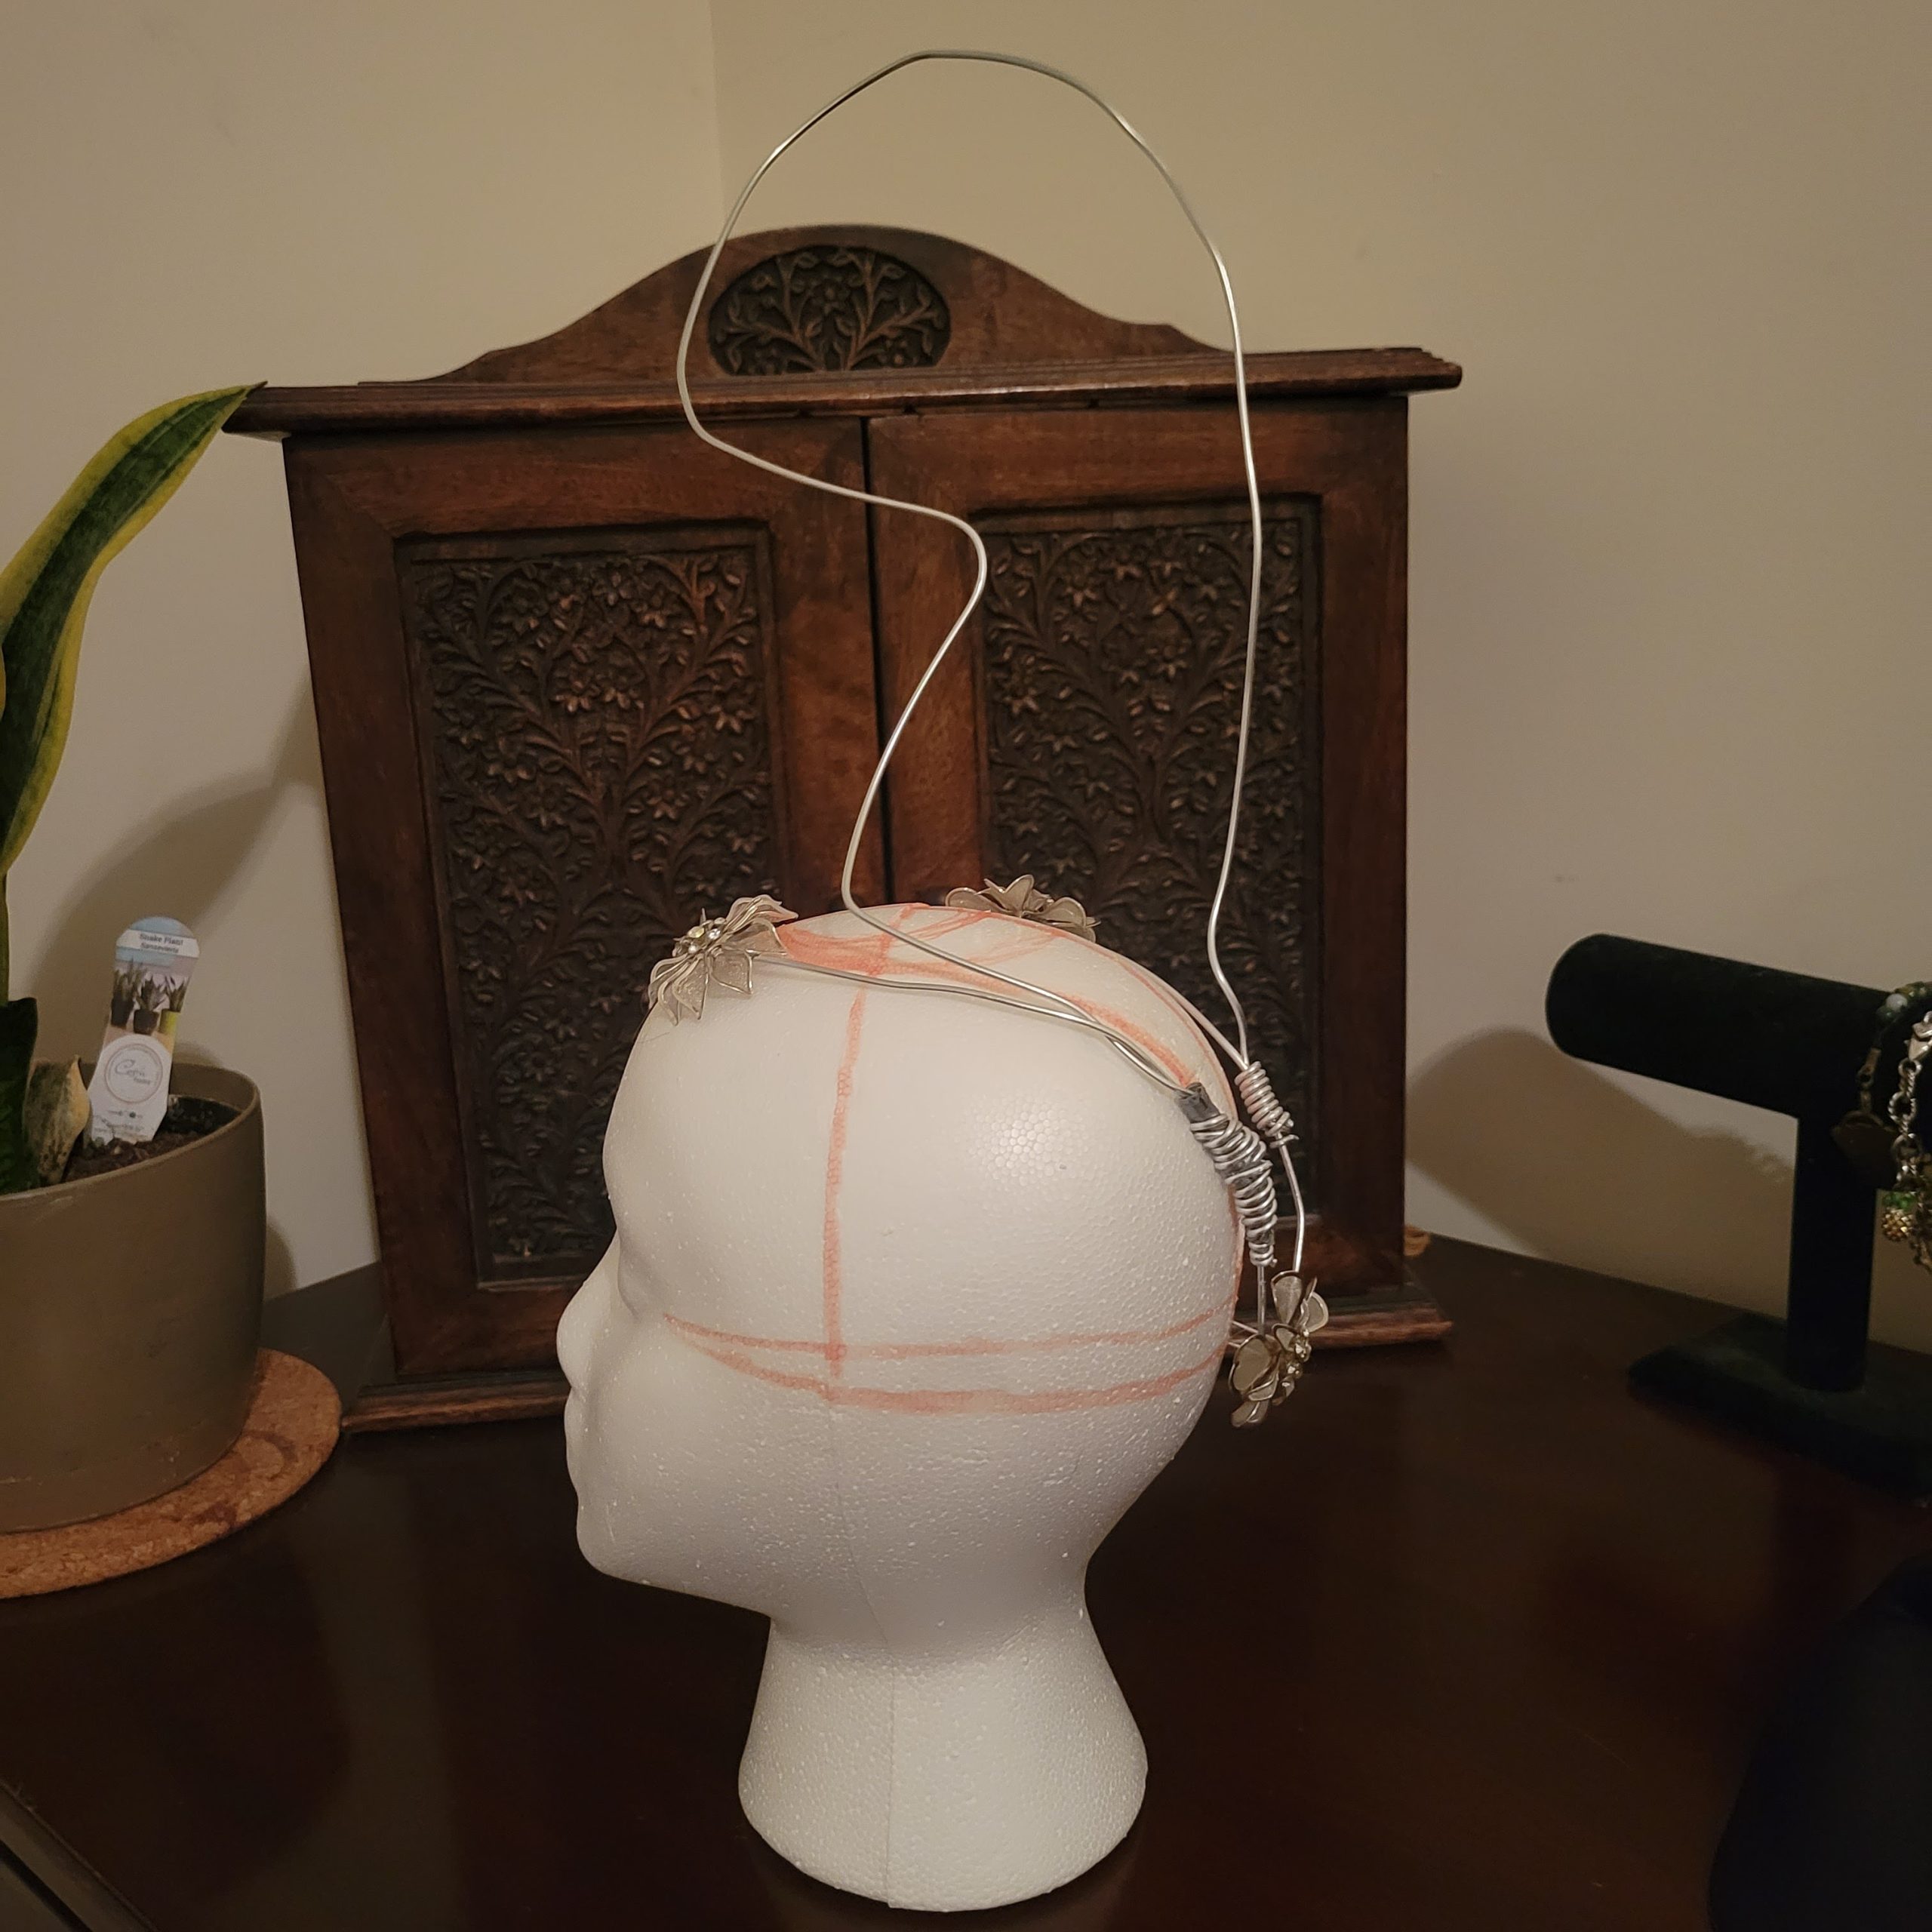
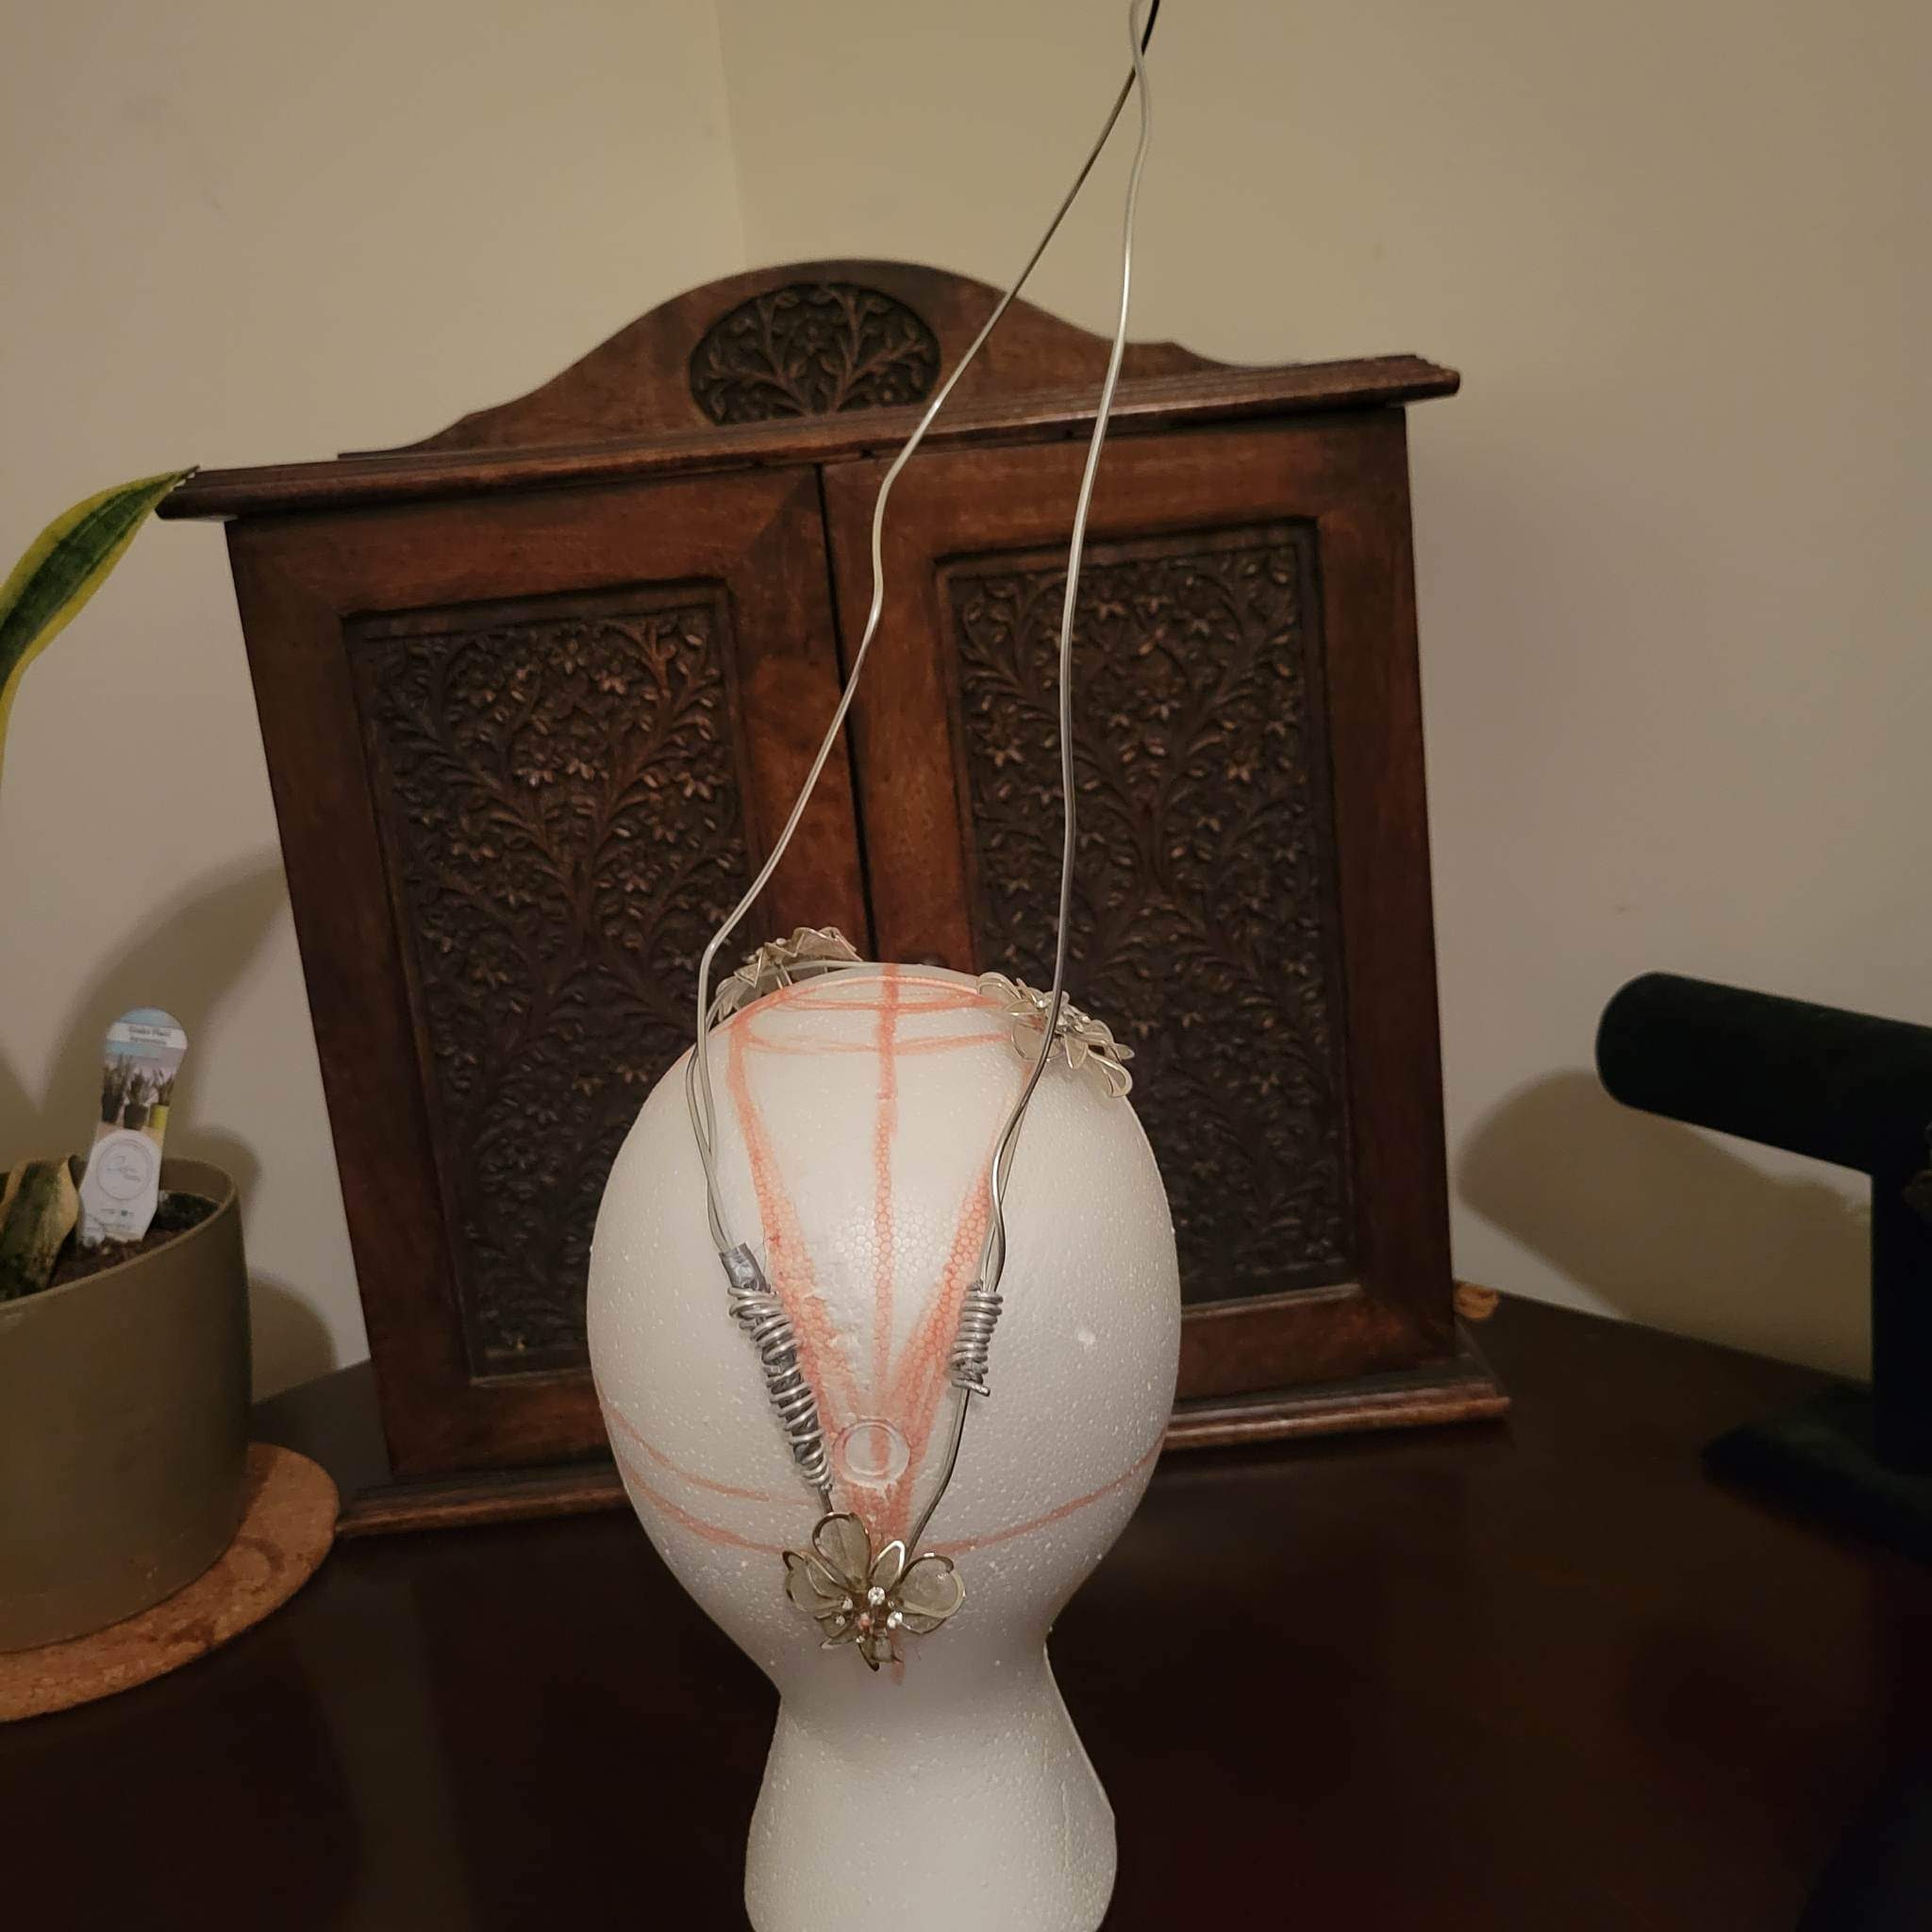
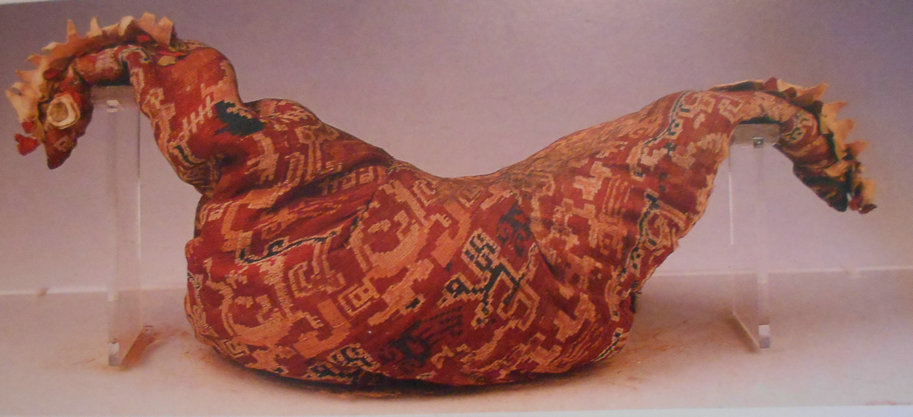
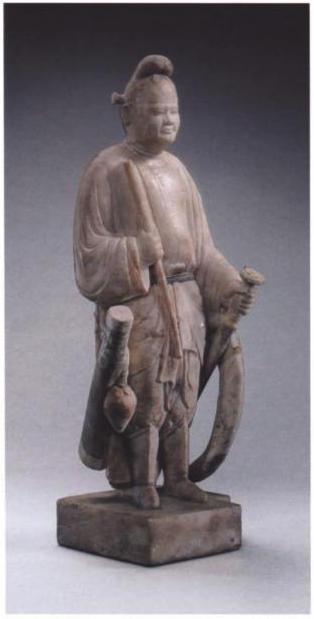
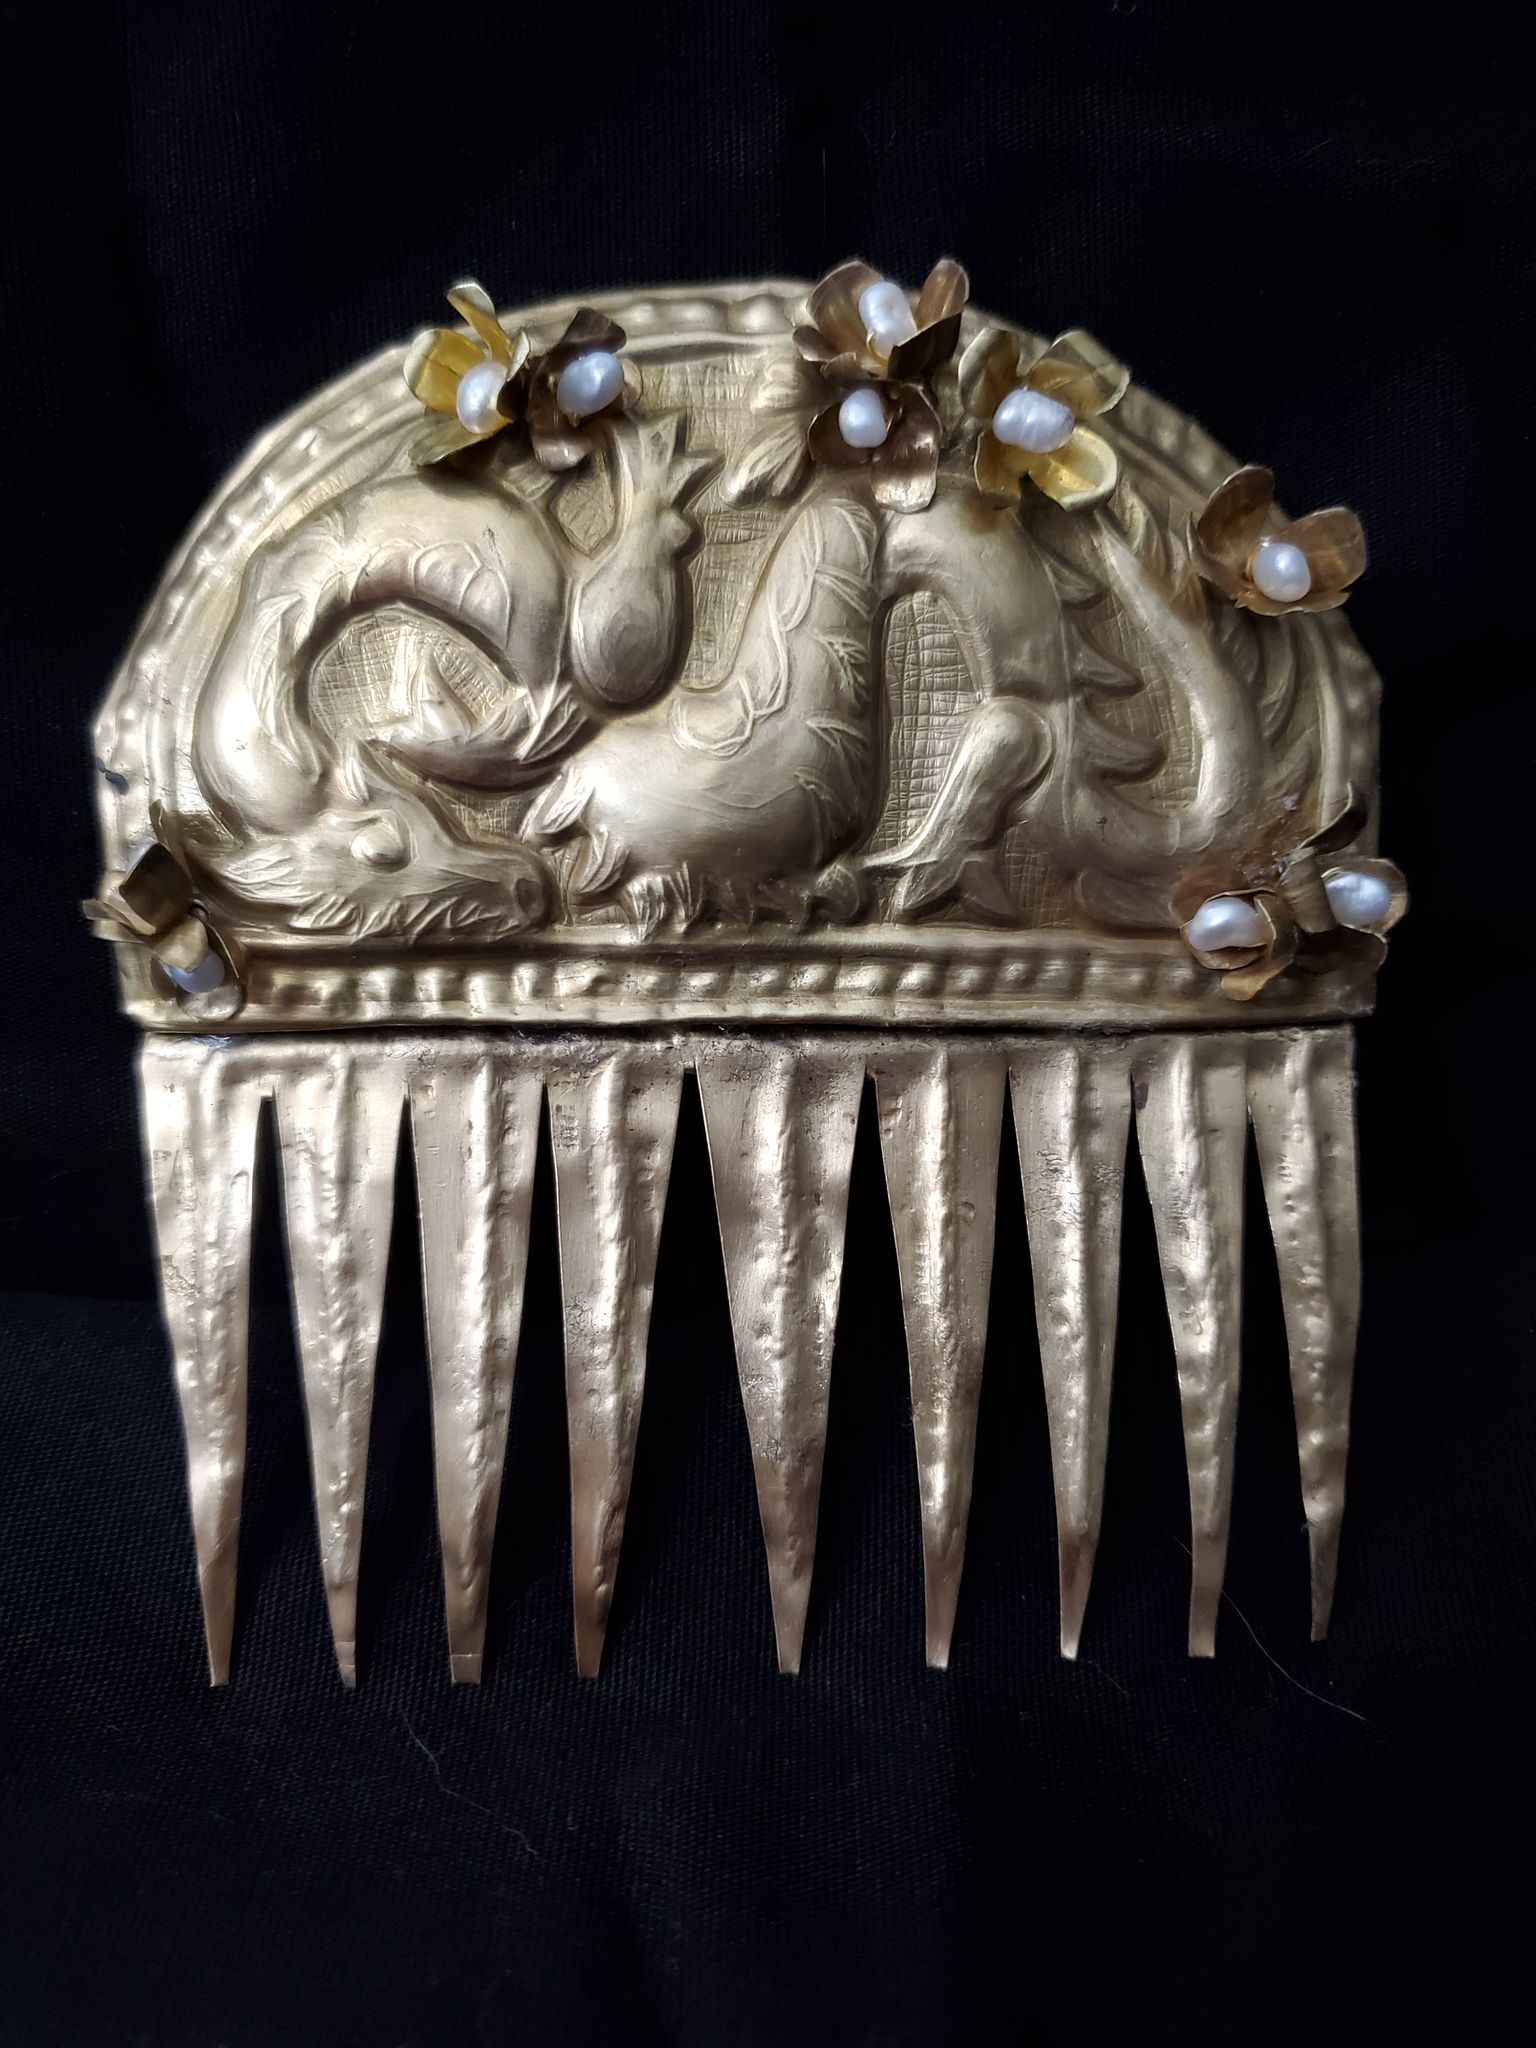
Because of the height and potential weight issues, I knew I didn’t want to try to create this piece with hair. This would need an under-structure, and adding hair on top of that could potentially add too much weight and make the piece difficult to wear. We have an example of a wooden hairpiece from the Tang Dynasty2, so I knew that I had some options. I decided to use a combination of wire armature and paper-mache for my headpiece.

I used a styrofoam head to model my headpiece on. These heads aren’t the same size as actual human heads, so I removed the headpiece from time to time to check it on my own head.

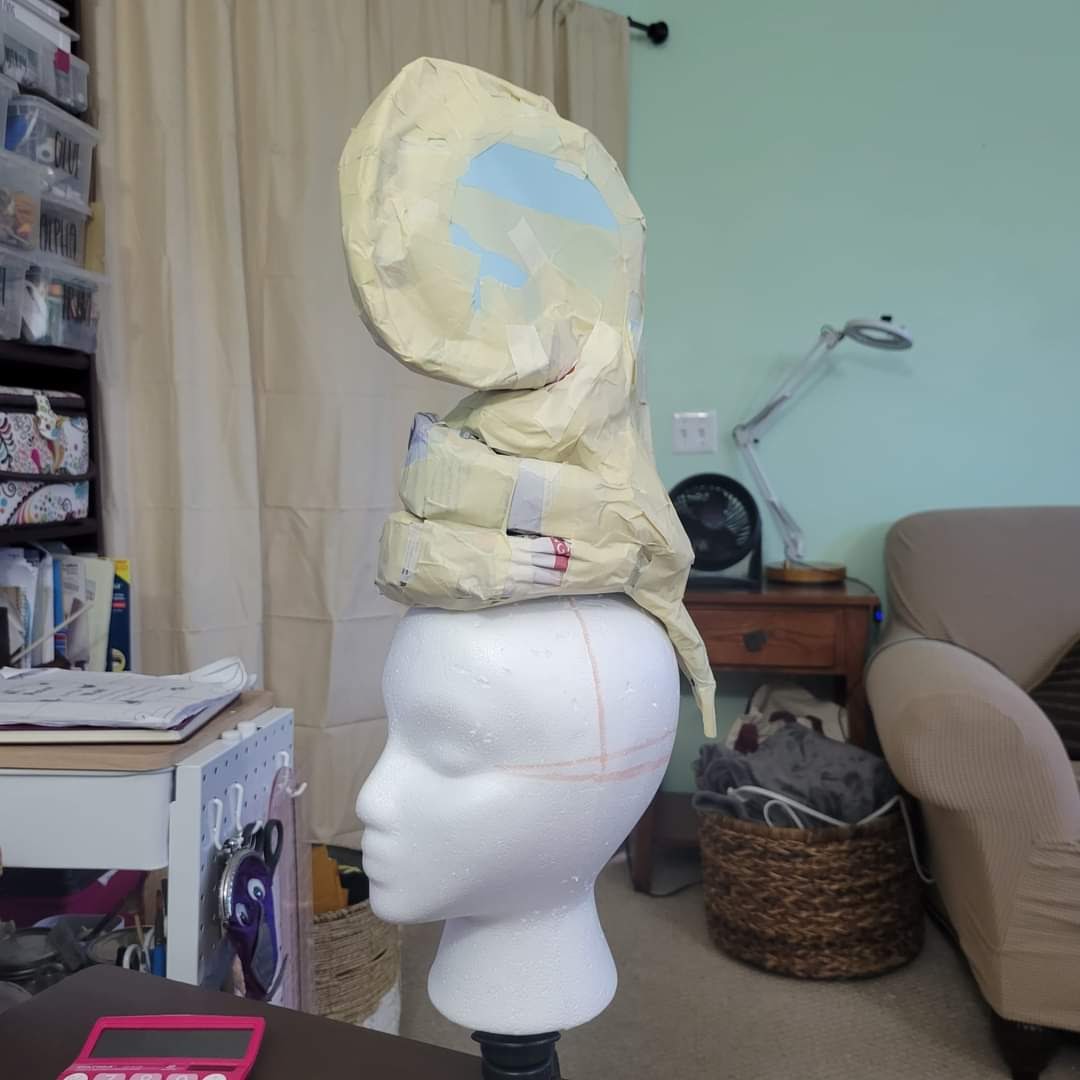
Once I had the wire armature, I used cardstock and masking tape to do the initial side and back forms. I then used newspaper and more masking tape to do the form the front sections. Once I had a form I liked, I started covering it with paper-mache.

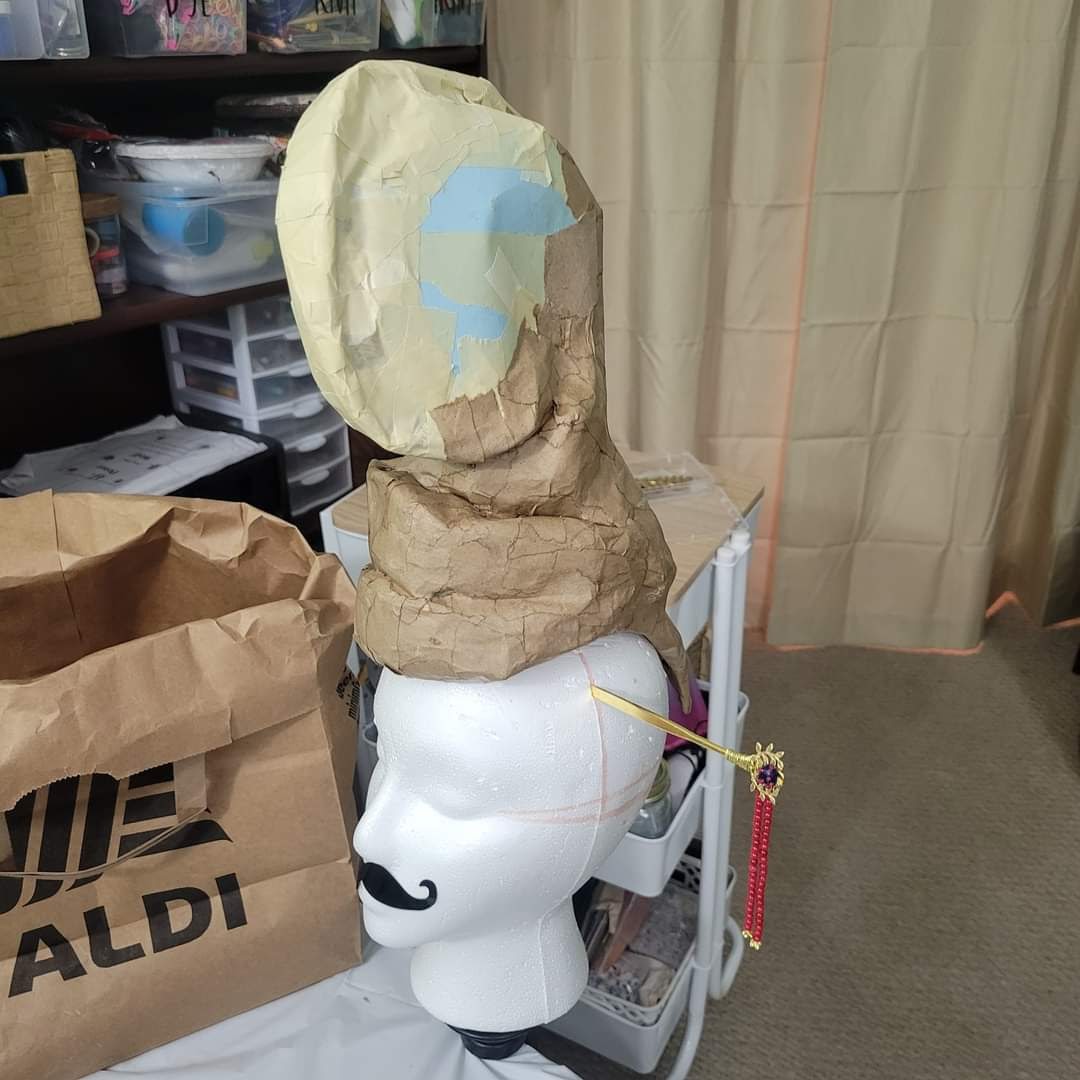
For my paper-mache, I used brown kraft paper and diluted woodglue. I tore the paper so that the edges would blend and used a combination of my fingers and an old paintbrush to apply the glue to the paper and then the paper to the headpiece. I did one layer of paper-mache, then went back and added another layer in the areas where the forms were more complicated (the front, around the top edge, the inside edge, and the back) to add strength and ensure smoothness.

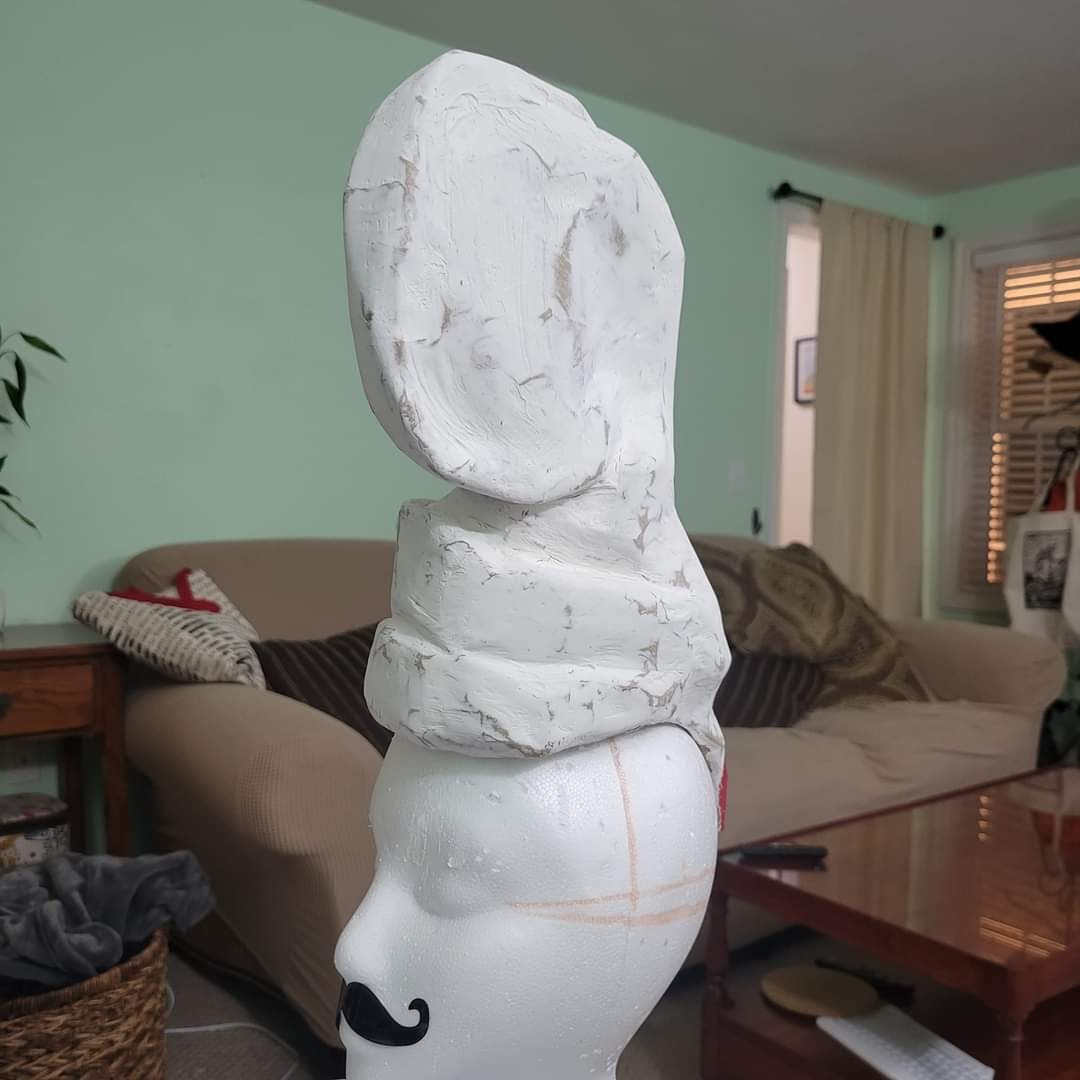
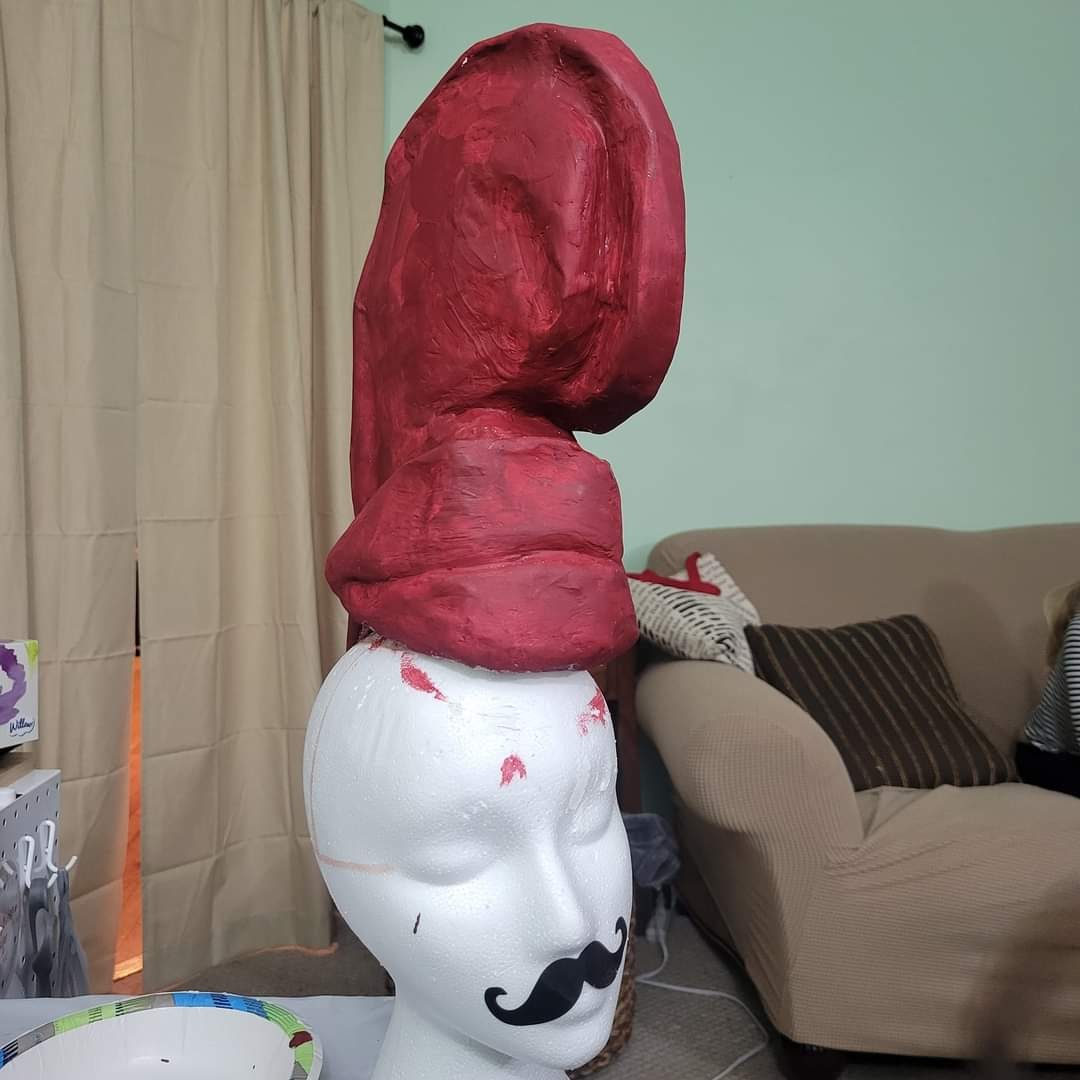
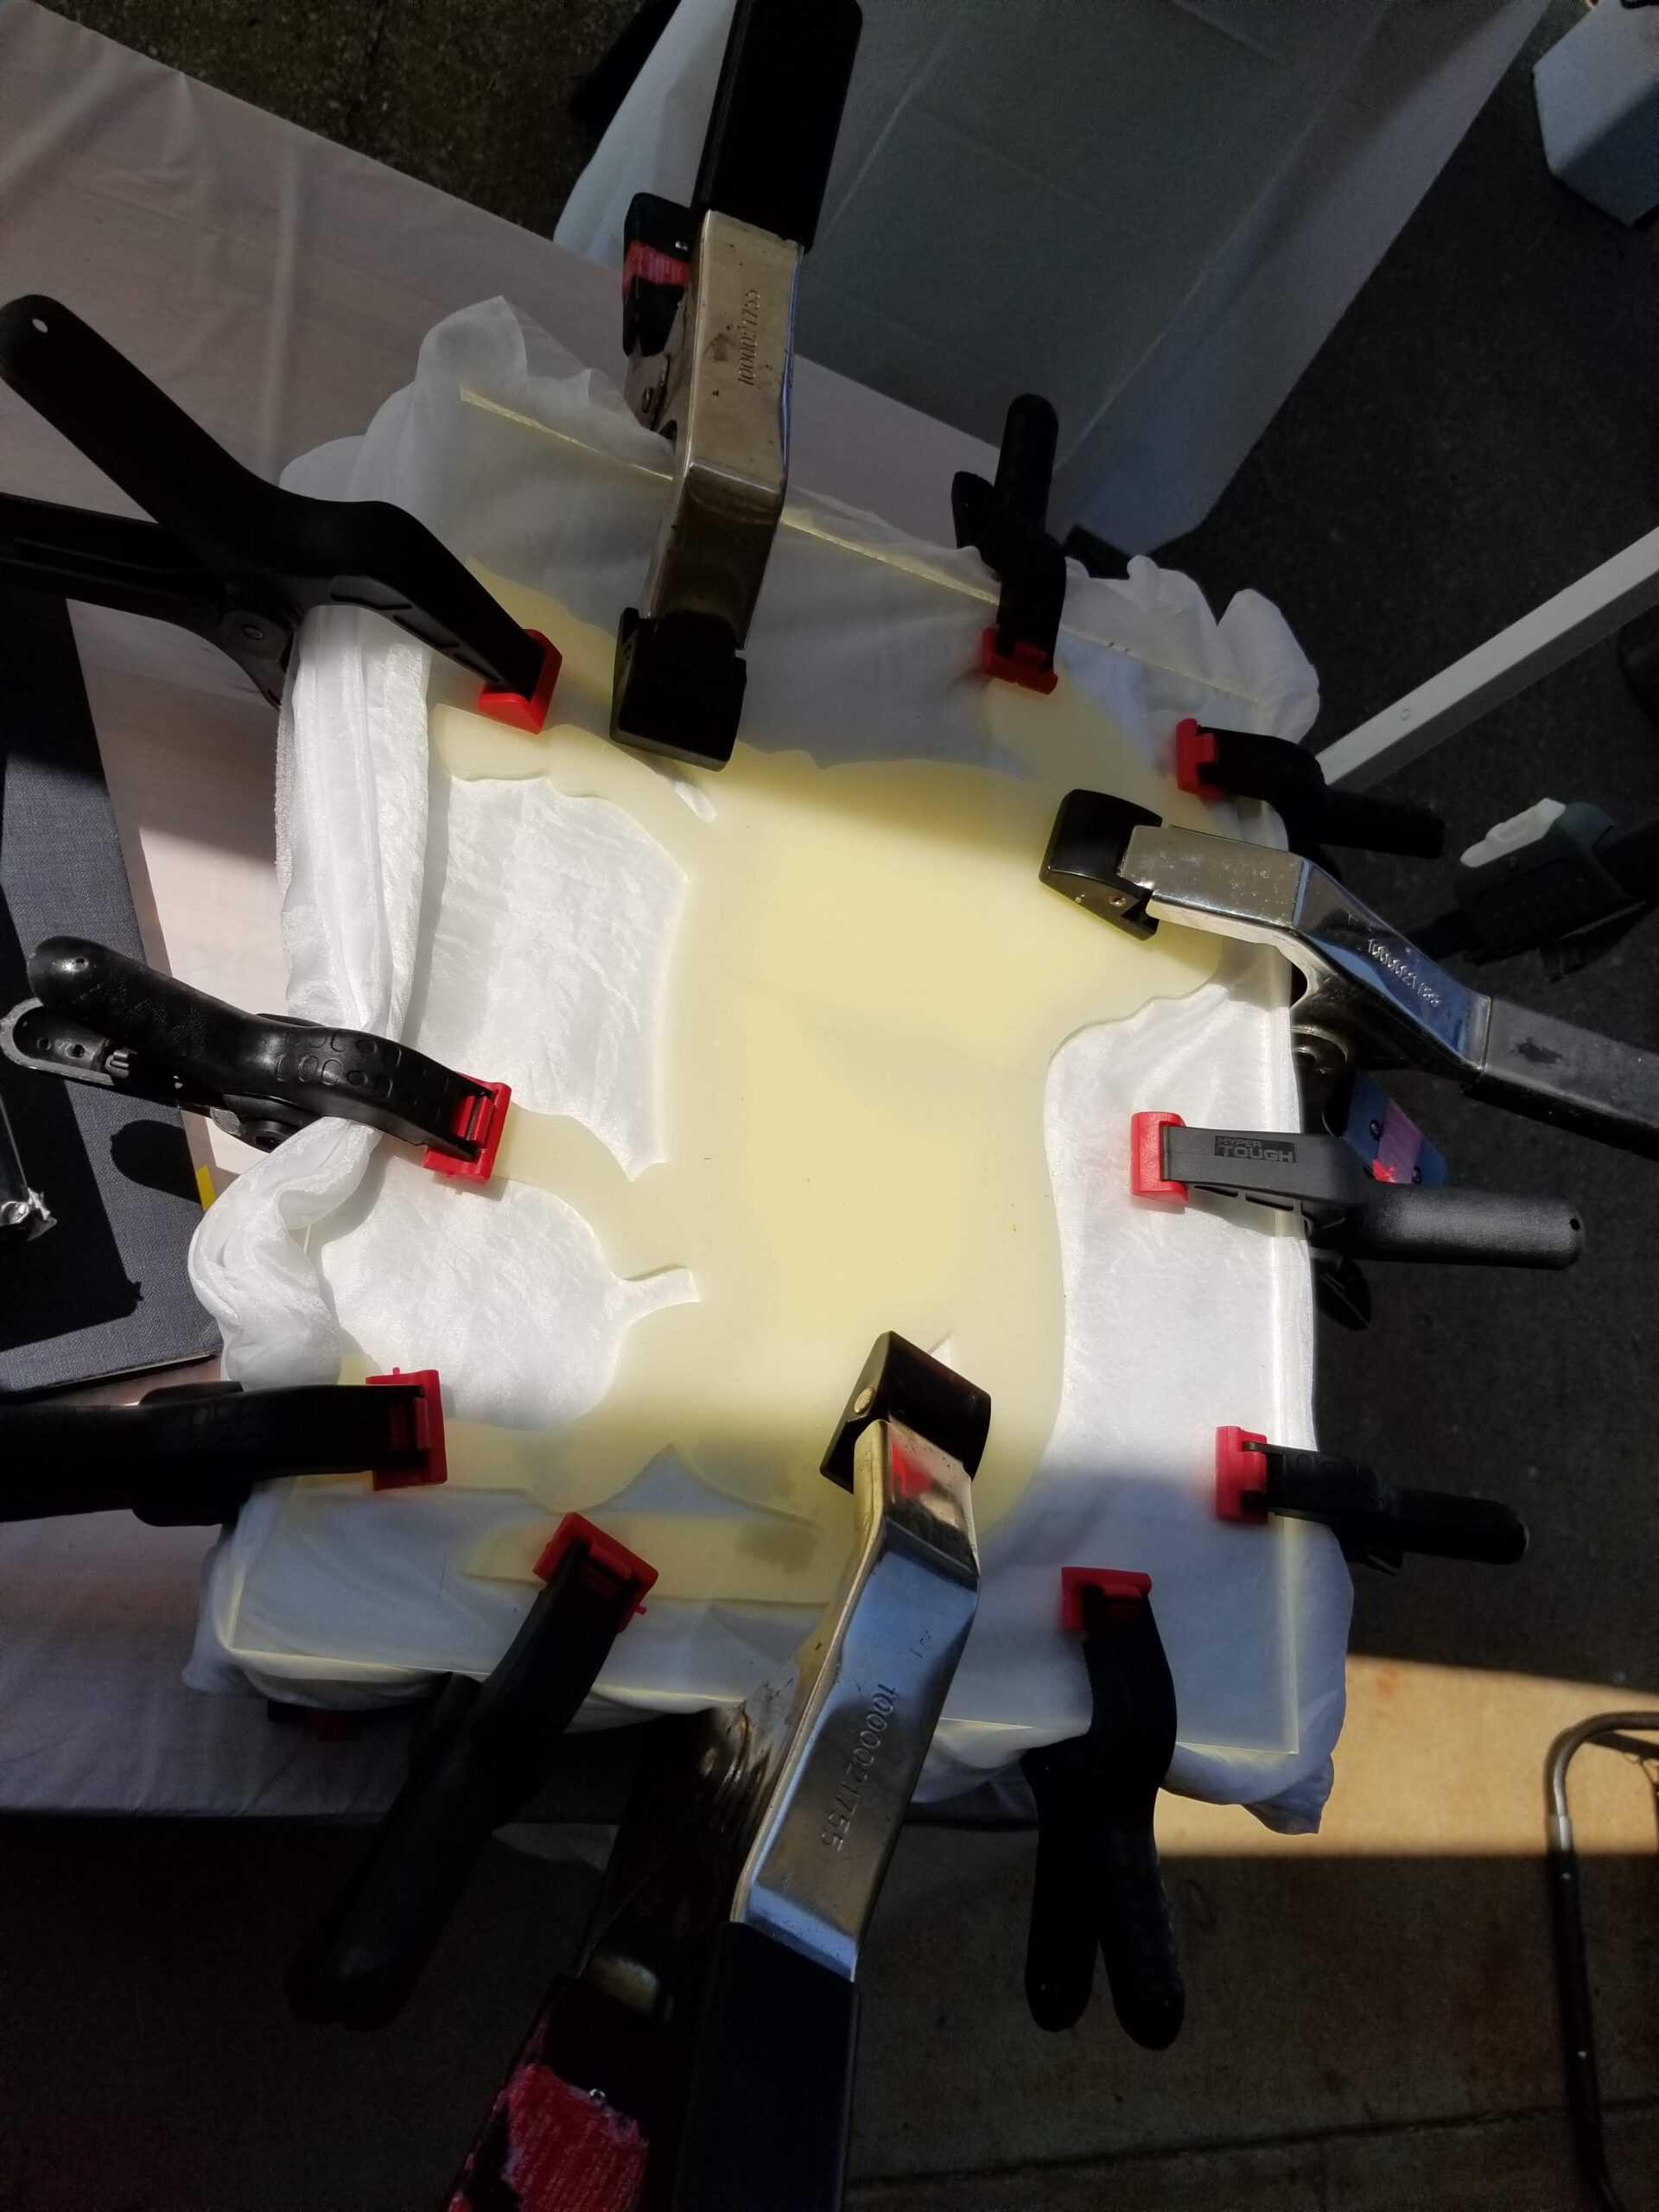
After the paper-mache had dried, I added a layer of a white glue and joint compound mixture to once again smooth out the forms. Once that was dry, I sanded it to remove my tool marks and fingerprints.

With the form complete, I mixed up acrylic paint to try and match my hair color. I did several coats, starting with a base layer of darker red and then doing washes and dry-brushing to get as close as I could to my hair color.

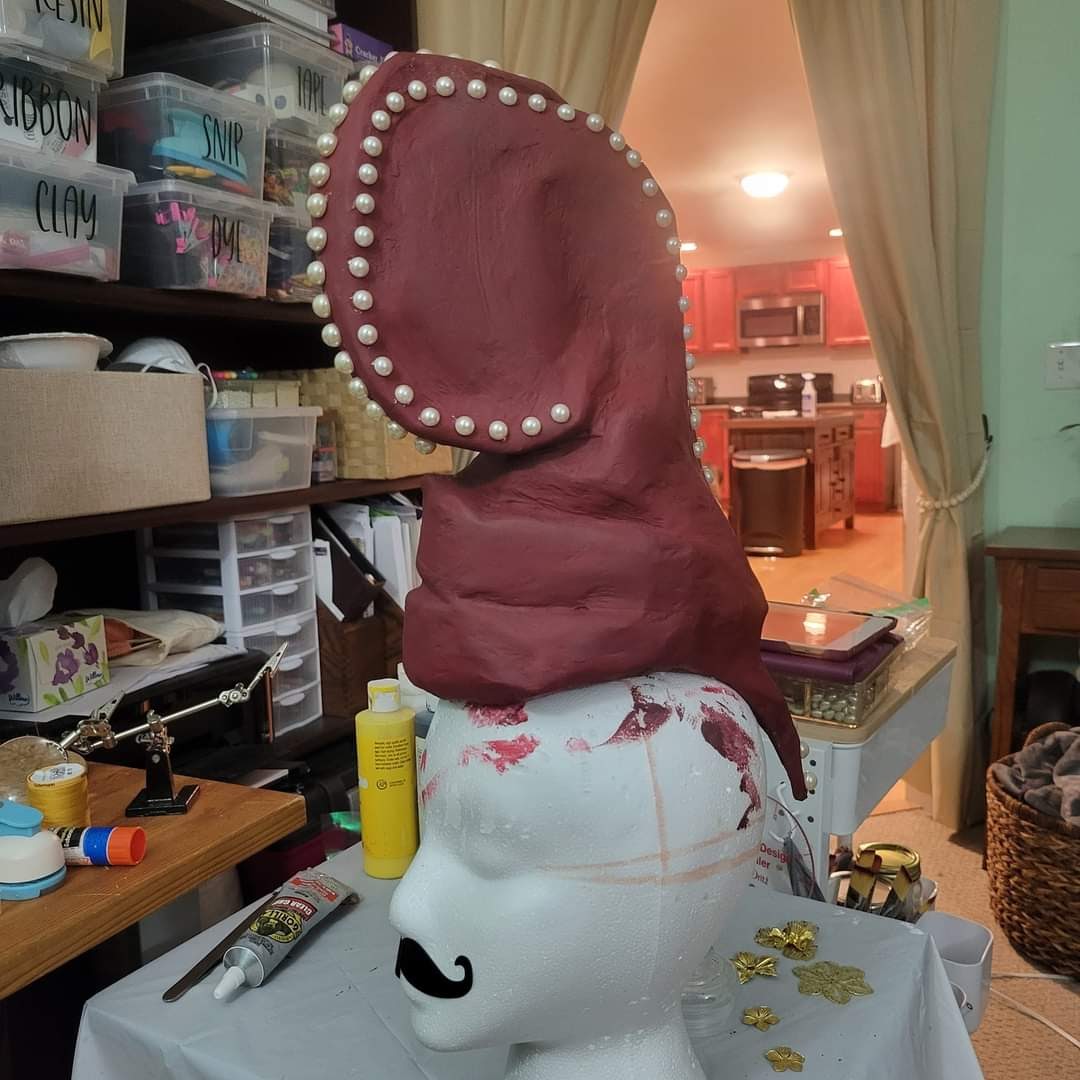
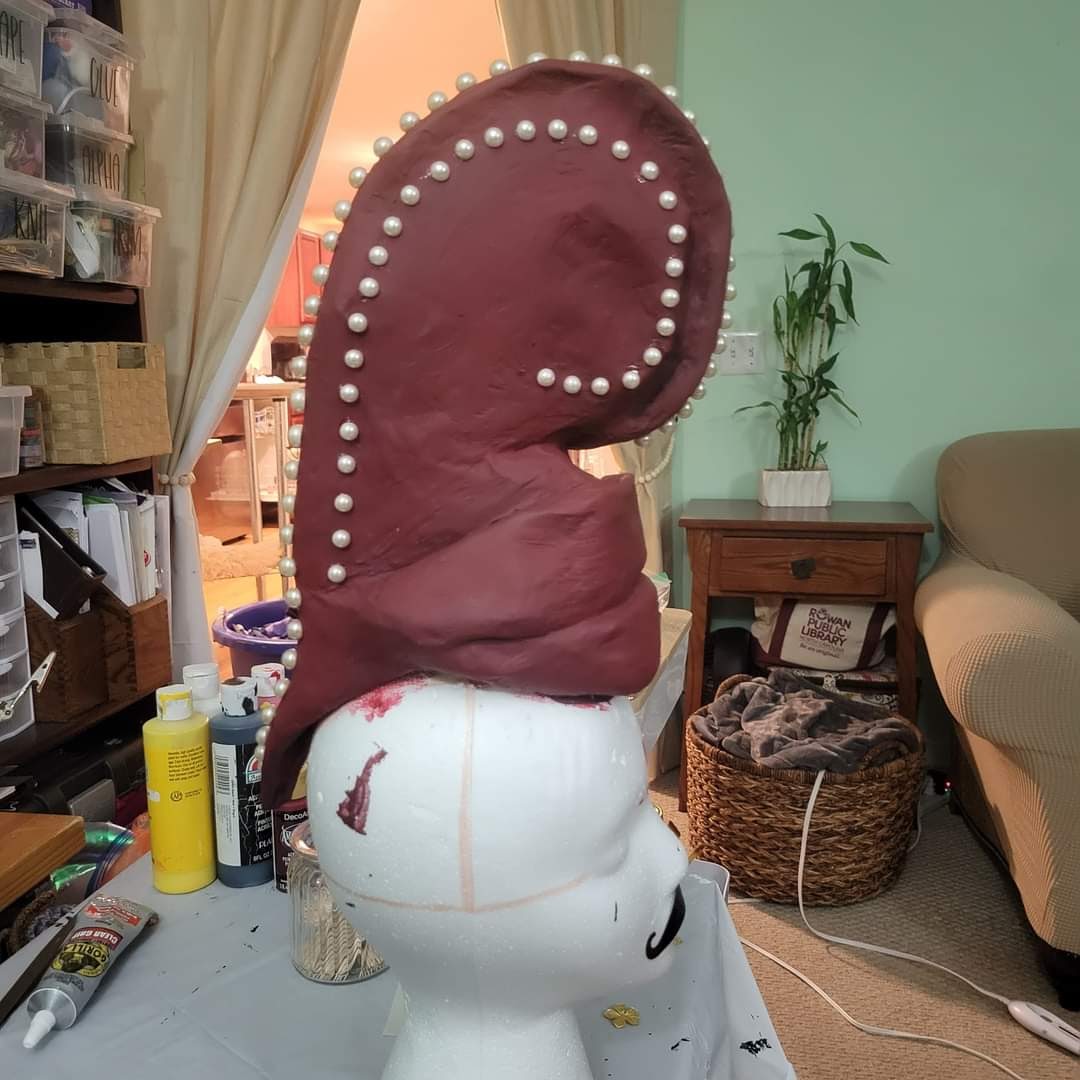
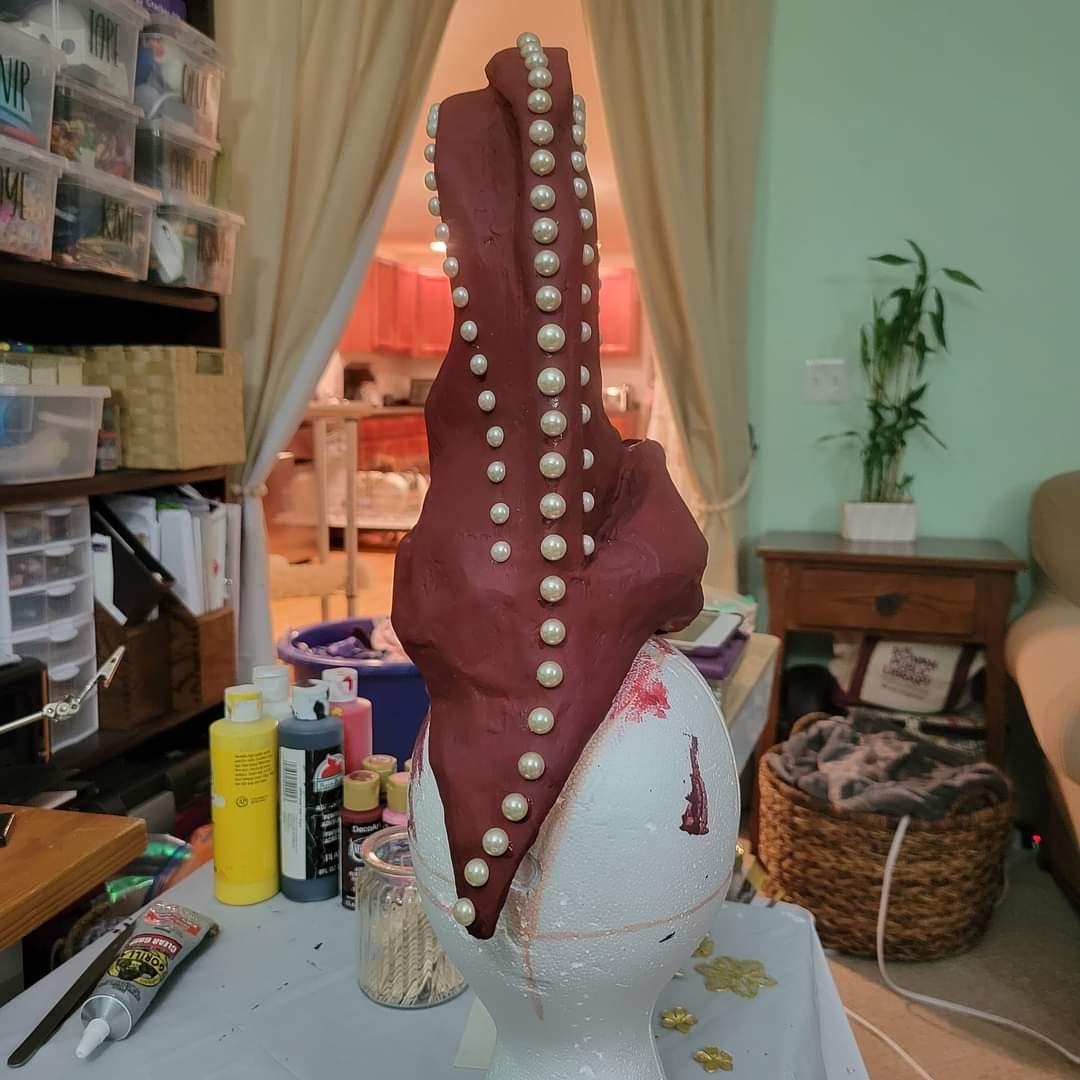
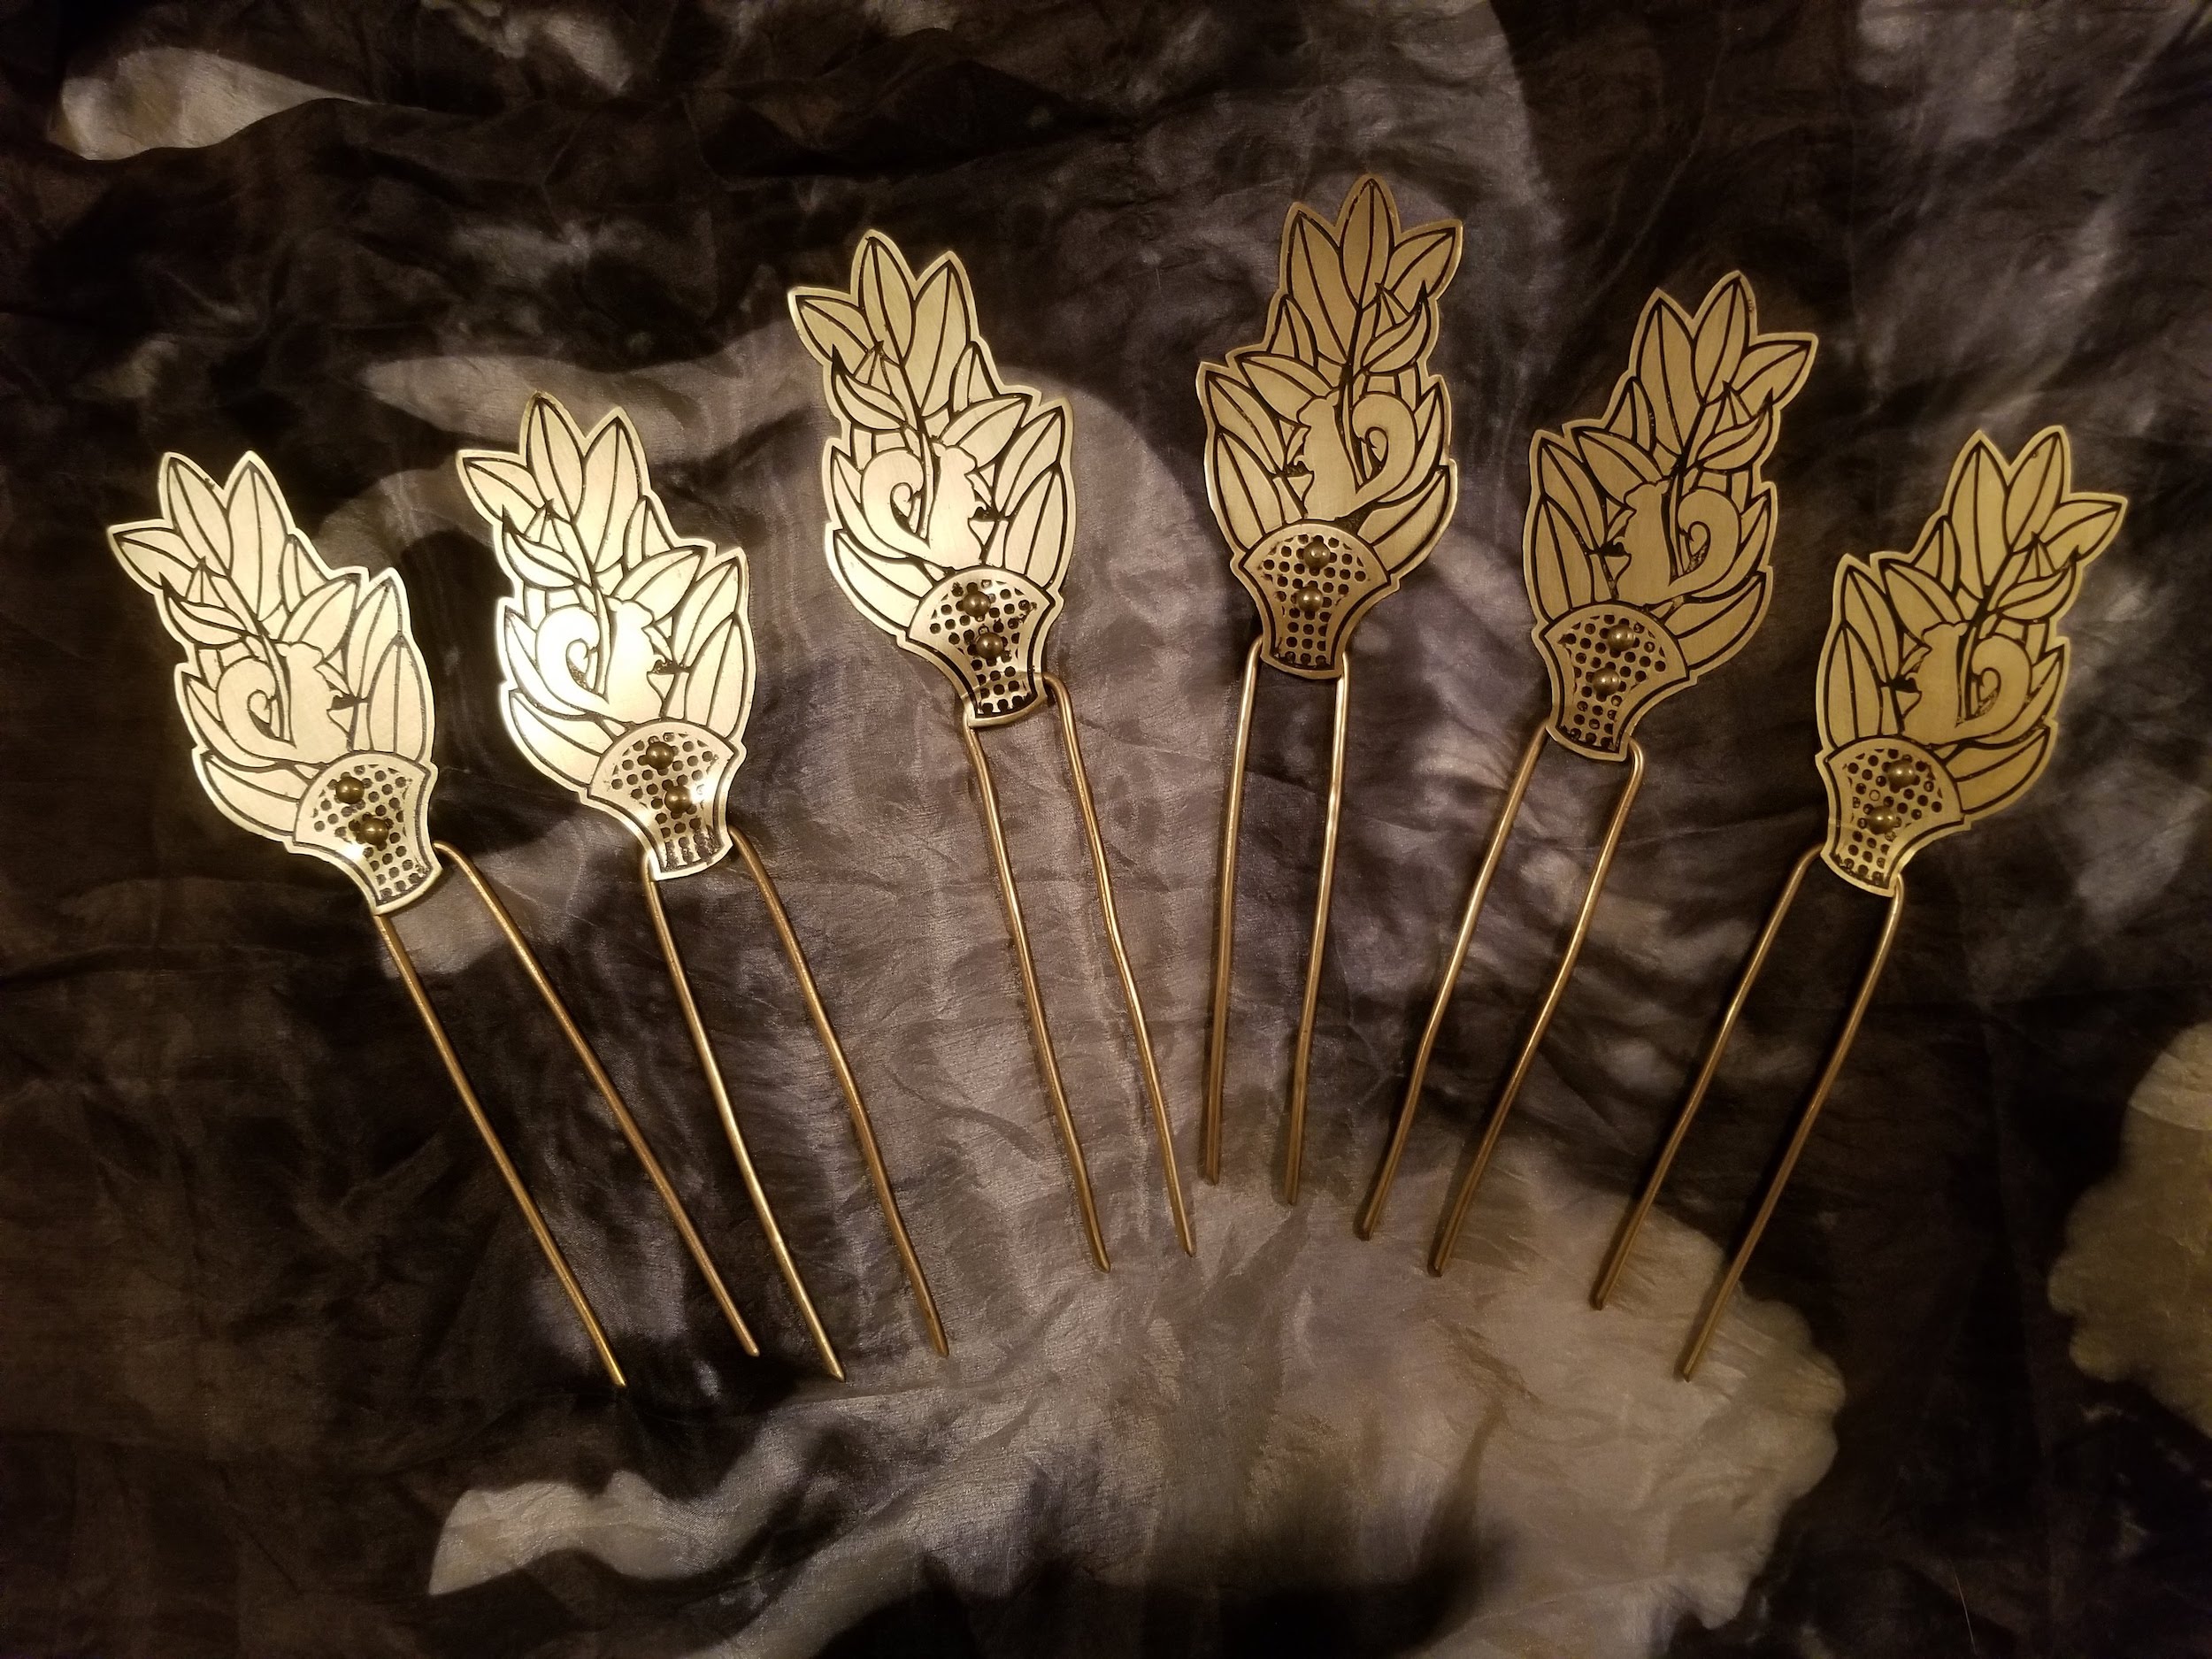
The headpiece in the engraving is decorated with stones and flowers. I initially intended to use brass stampings for the floral embellishments, but I couldn’t find what I wanted from a supplier. I ended up doing a quick 3D model of two different flowers and printed them in PLA on our Ender-3. I then painted them with gold spray paint. I used faux half-pearl cabochons for the stones. I attached everything to the headpiece with E6000 glue. Lastly, I braided some kanekalon hair and attached it on the bottom and inside edge with hot glue so that I would have something to pin into to secure the headpiece.

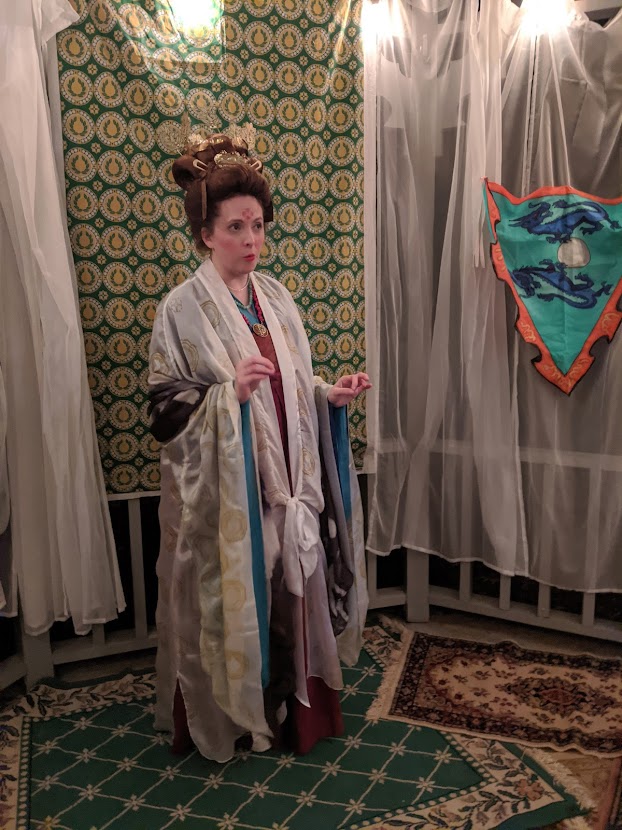
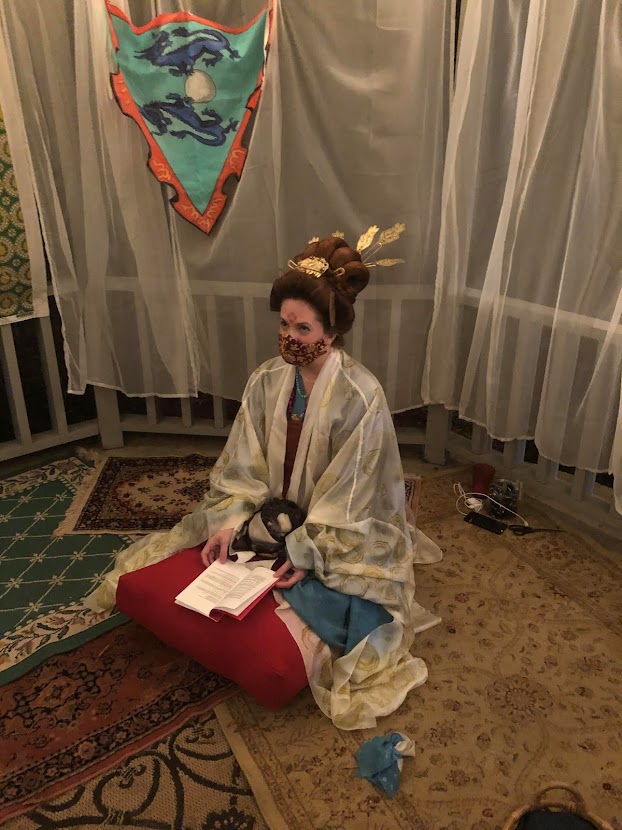
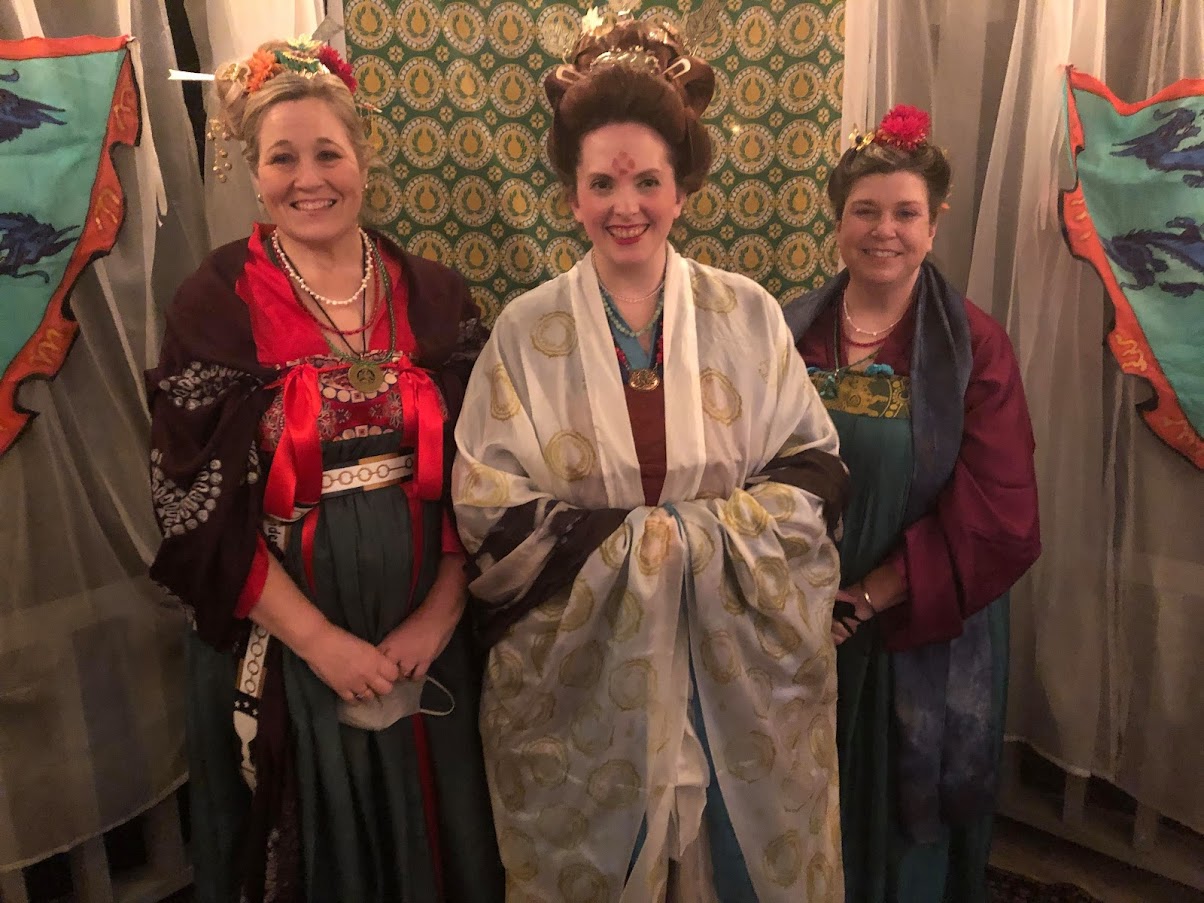
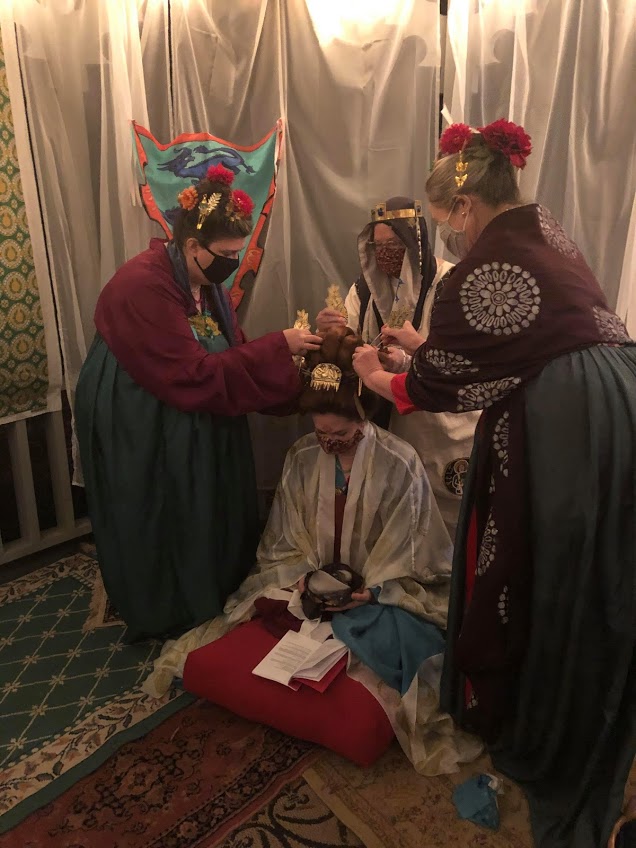
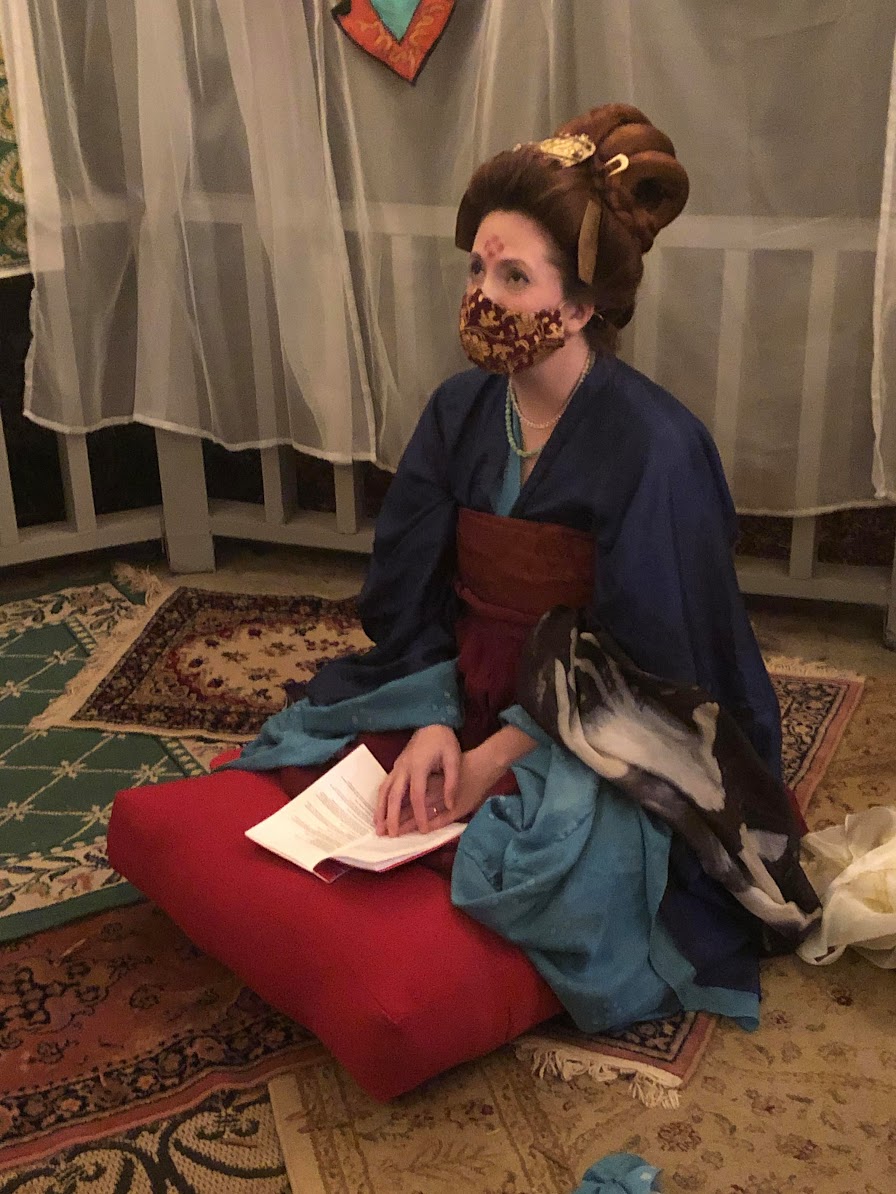
I’m incredibly thankful to Dame Katerinka Lvovicha for her time and skill in styling my hair with this headpiece for Birka. She did a fantastic job. I made a new hair rat using kanekalon hair I purchased in a color close to mine, which we used to beef up the back of my head, and another to help give body to the front and side.

A pale woman wearing early Tang Dynasty clothing wearing the headpiece standing in a hallway.
At Birka!

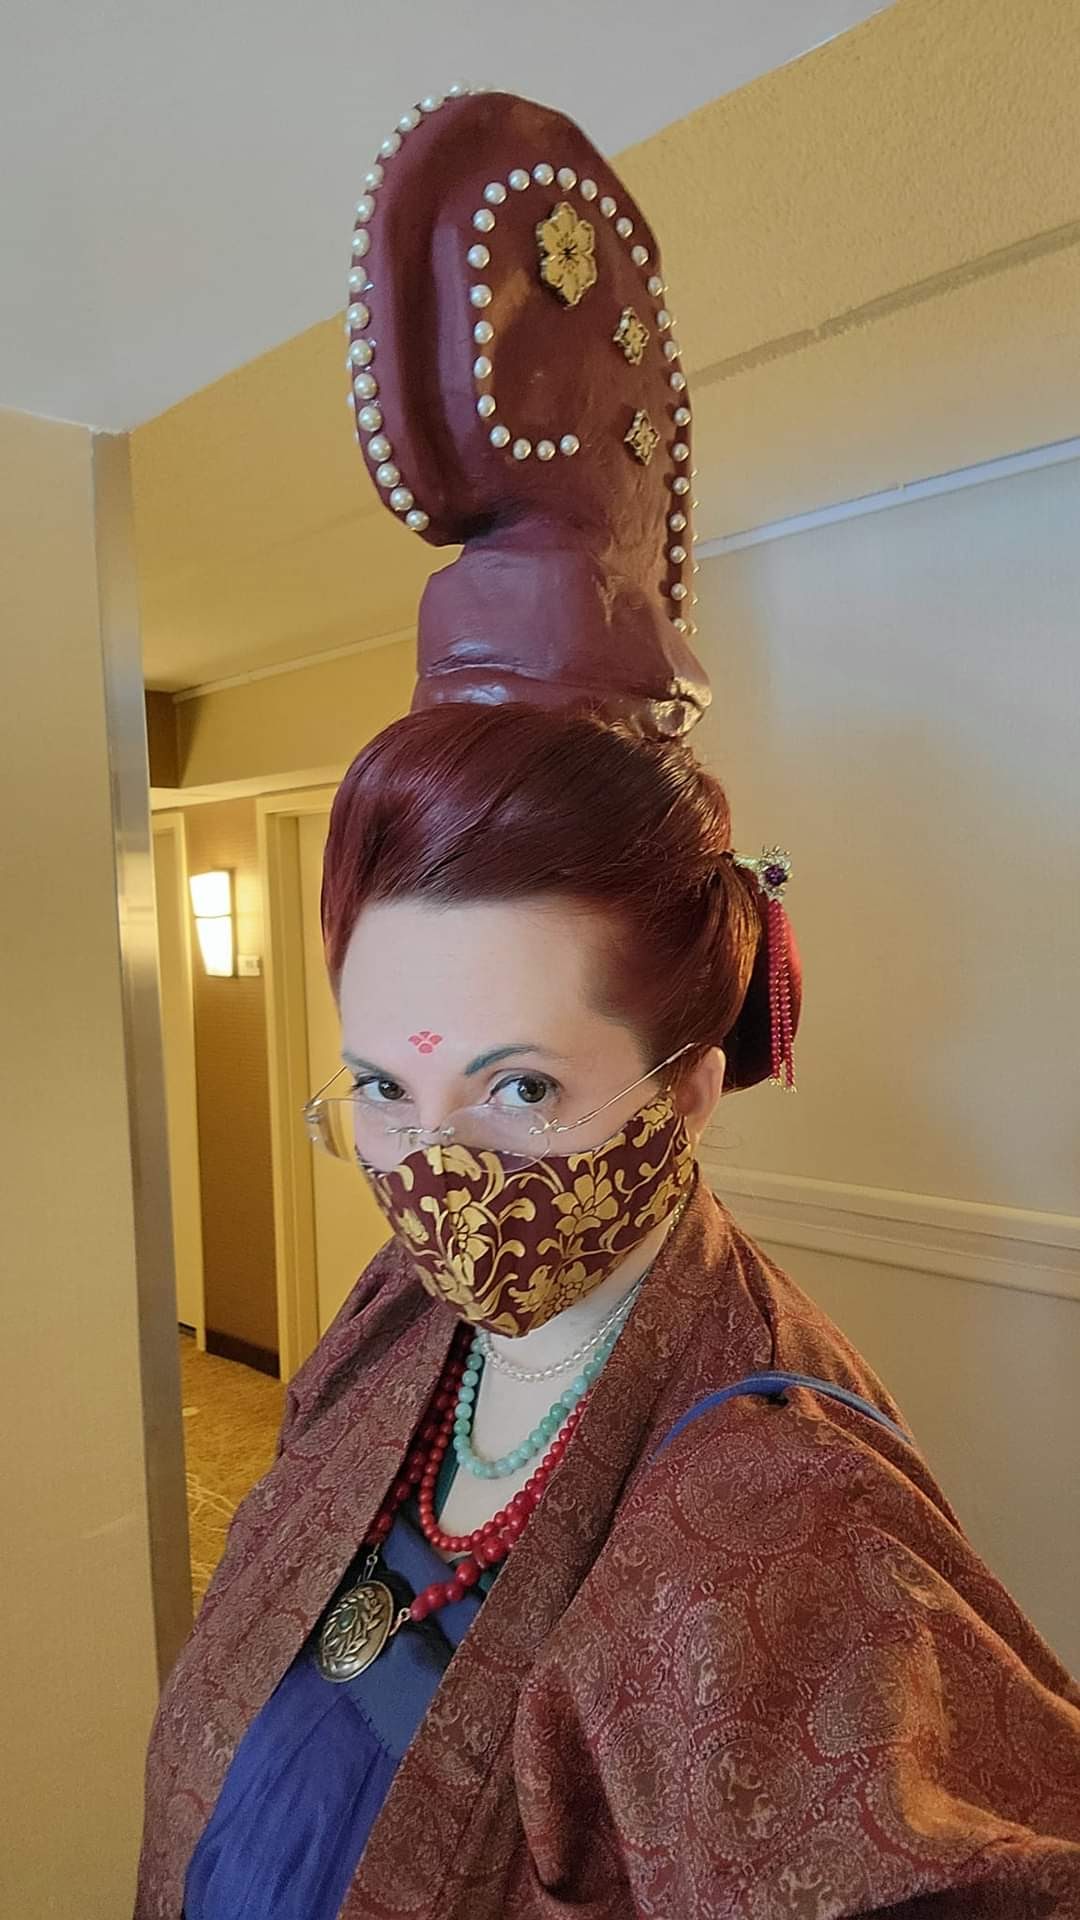
The headpiece isn’t heavy, but given that I wore it slightly back on my head, it made me very aware of my posture. If I slouched, it would strain my neck and shoulders.

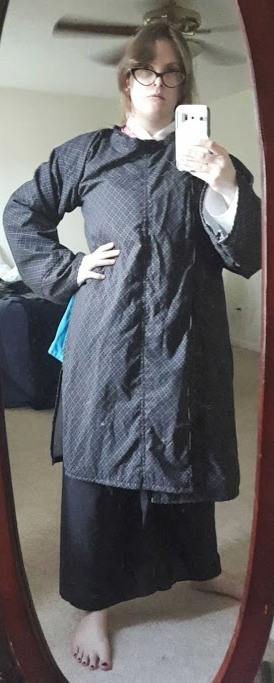
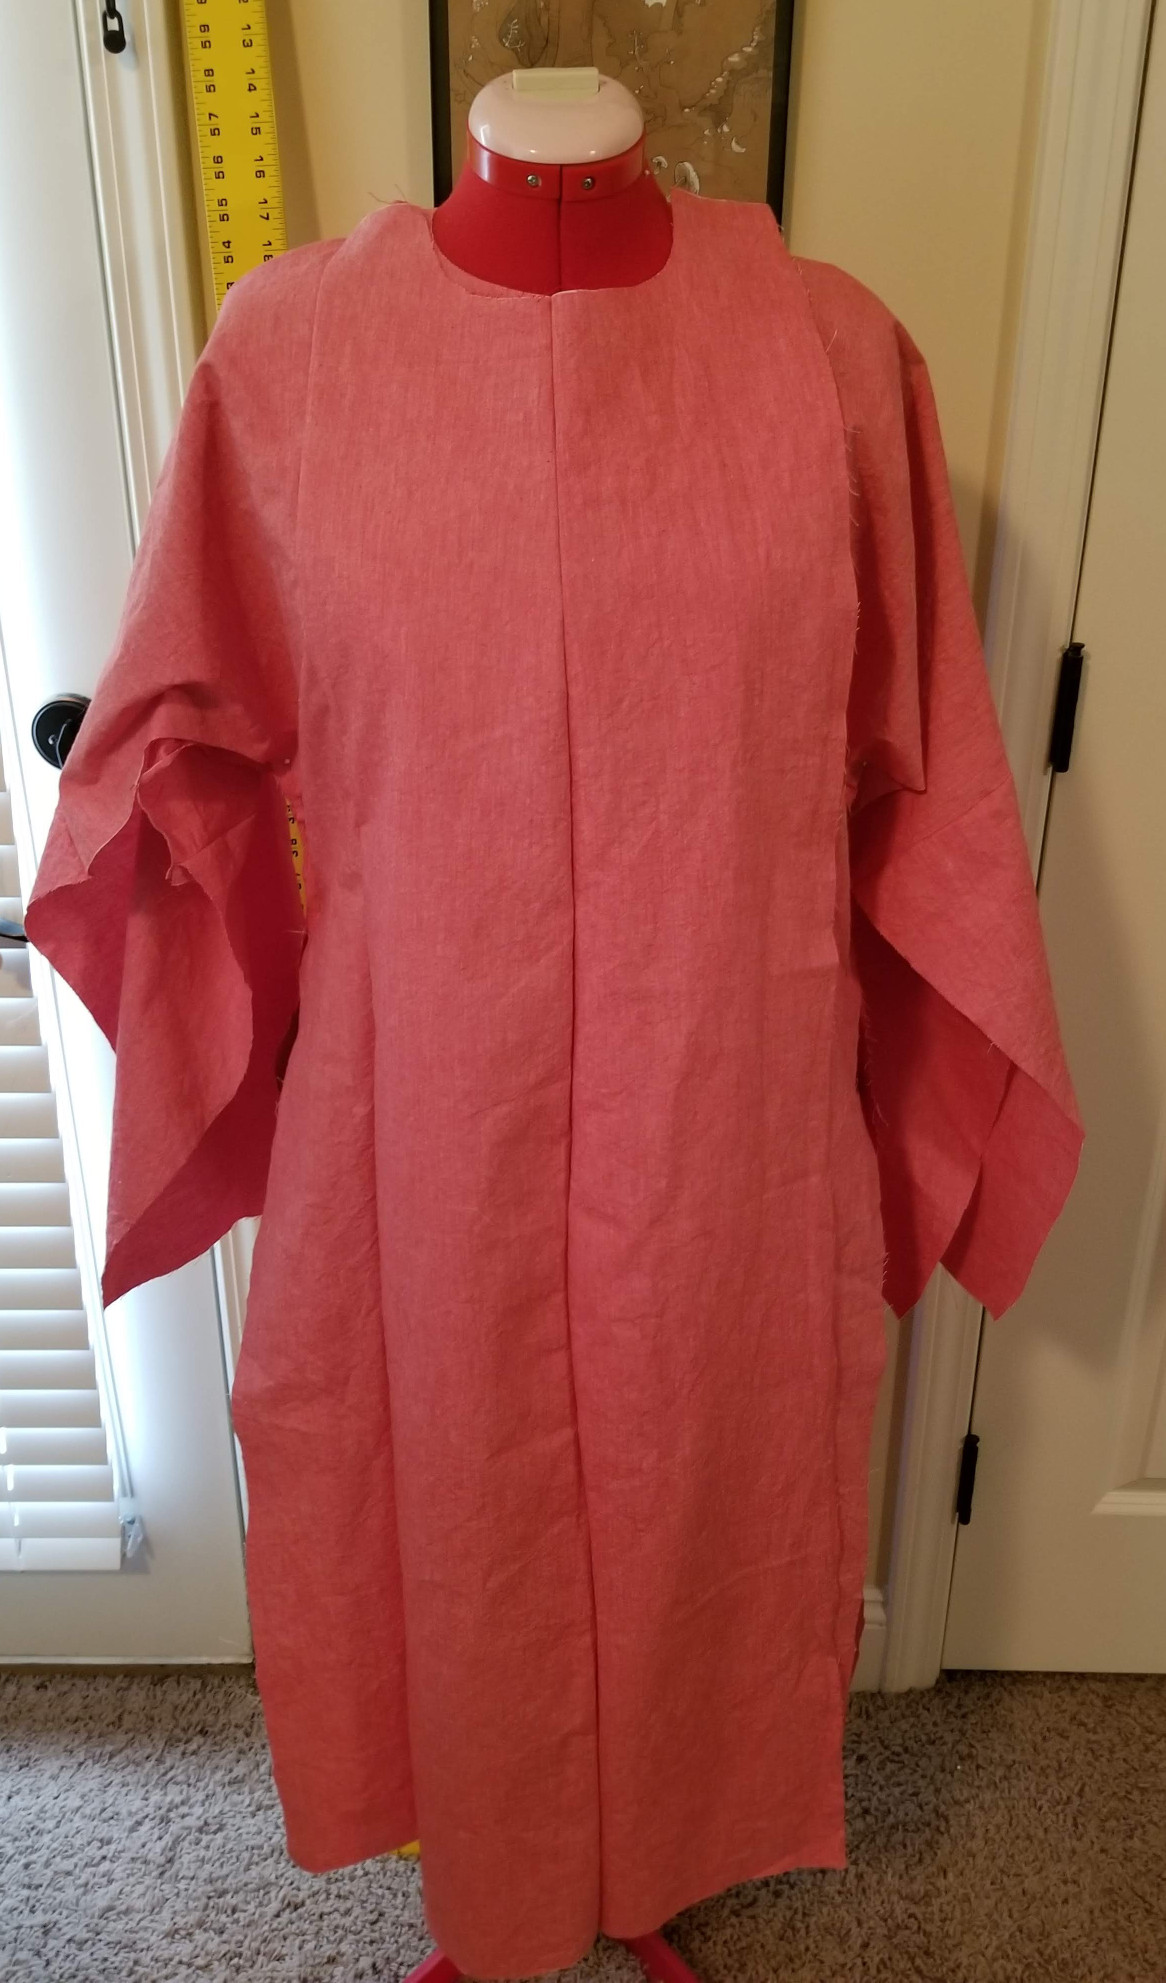
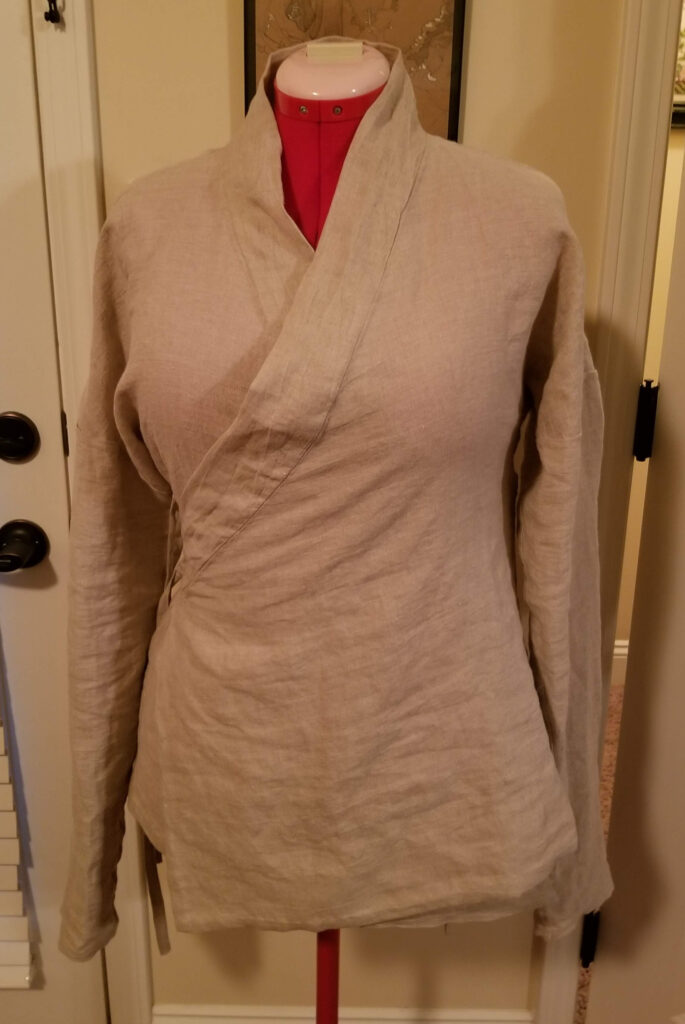
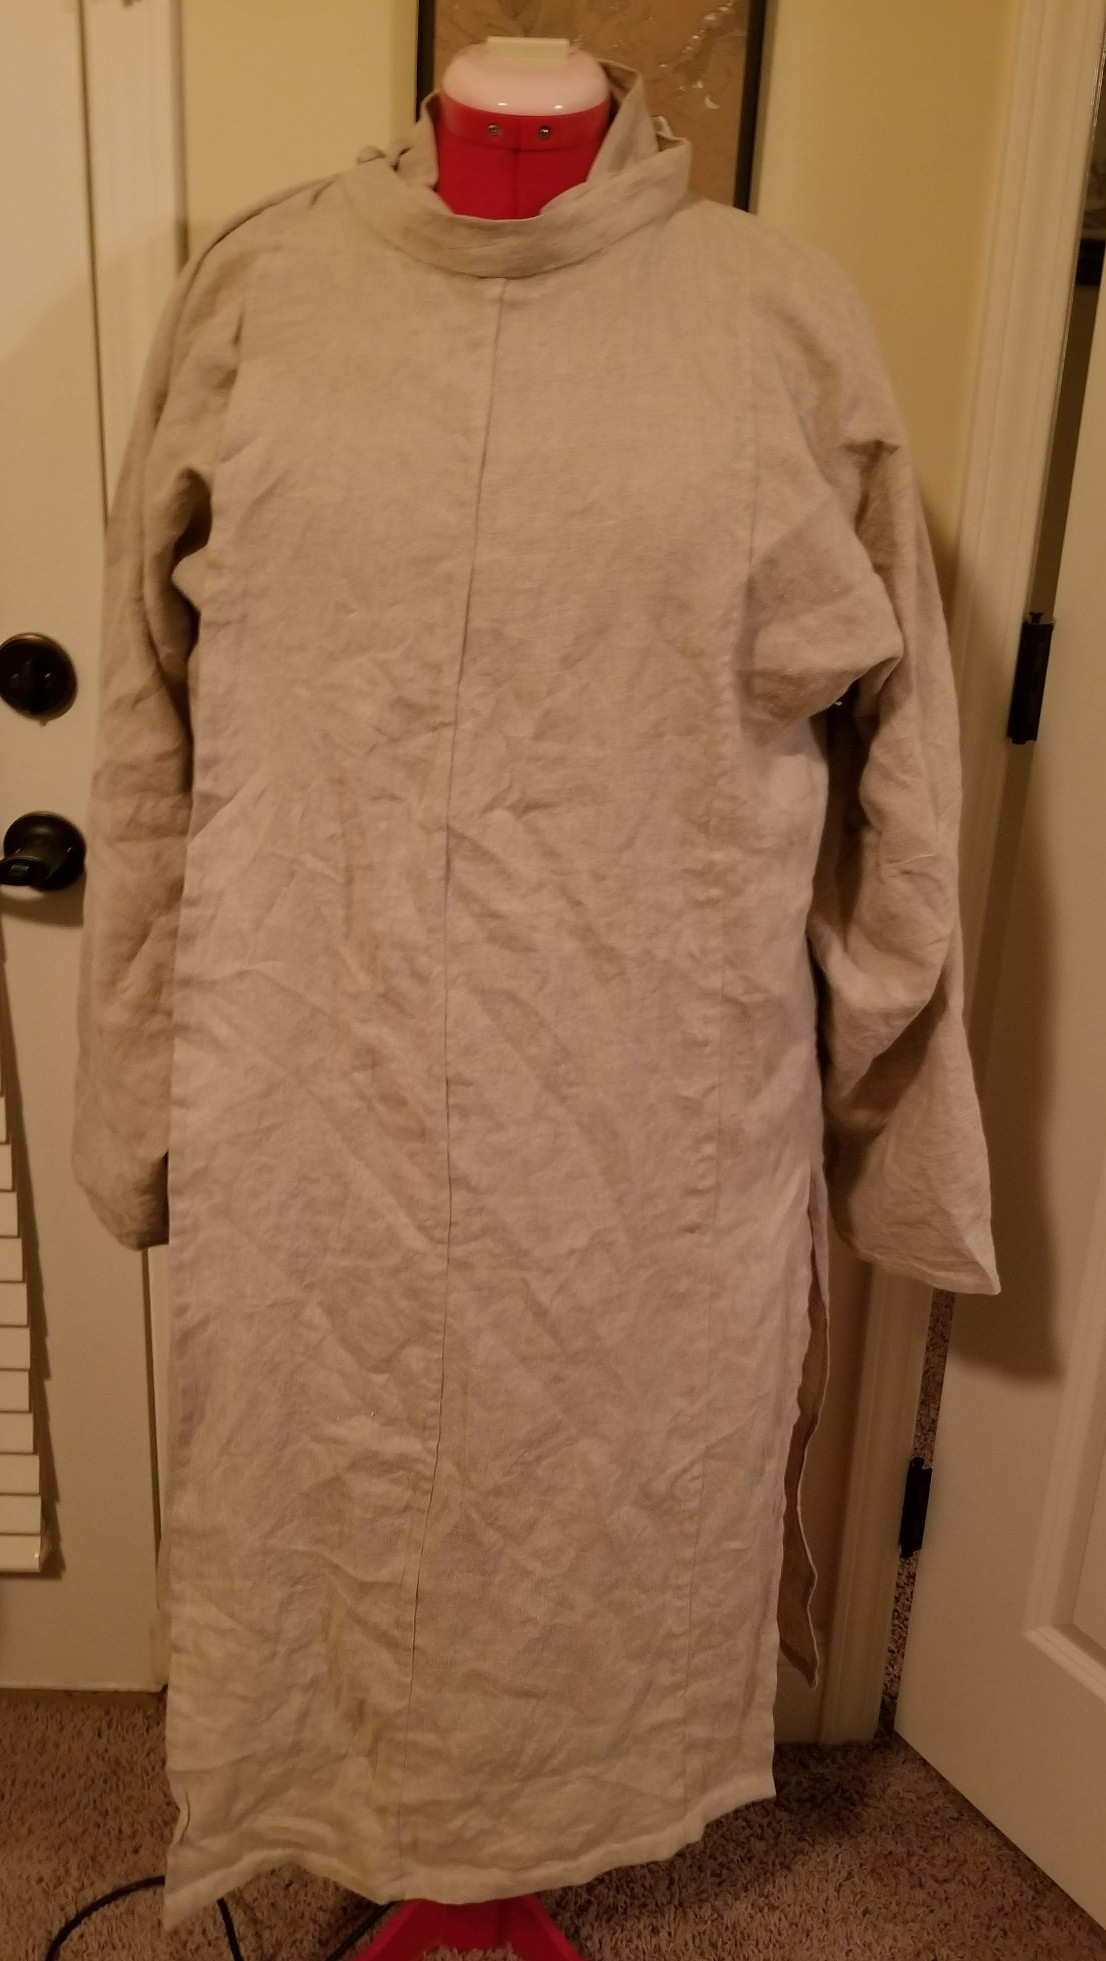
I’m really happy with how the headpiece came out. It’s a great option to have for my early Tang Dynasty wardrobe, which I’ve been reaching for more and more. I love the big, swoopy sleeves, but I also like the modesty that the banhi provides.

  1. Zhang, J. (2014). Thoughts on some grave goods from the tomb of Li Chui. In S. Grieff, R. Schiavone, J. Zhang, Hou, G., & Yang, J. (Eds.) The Tomb of Li Chui: Interdisciplinary studies into Tang period finds assemblage (149-168). Mainz, Germany: Römisch-Germanischen Zentralmuseums
  2. Ibid

Looking In and Giving Back

After moving (again – Hi, East Kingdom!), I’m finally in a position where I can make an effort to start blogging again. The goal is still to do at least one post a month. I have three posts sitting in drafts right now, and I’ve pulled one SCA project off the backburner.

I wonder how pervasive the idea of giving and thanksgiving tied to this time of year is throughout human cultures. We tend to look inward to ourselves or our households when the temperatures drop, as a means of survival. But isolation isn’t good for us, so having community events that draw us out and together help keep spirits up. It’s one of the reasons why, despite it being a “minor” holiday, I enjoy Hanukkah. We’re literally getting together to light candles, play games, eat food, and have pride in who we are.

I’ve been thinking today about supporting community in the context of giving and giving back. Since my research for the past several years has focused on East Asia, I wanted to take some time to share some organizations doing work to support Asian-American communities, as well as some information to help unpack implicit biases, gain understanding, and help work toward making the SCA a more welcoming and inclusive space for everyone.

My brain runs on librarian software, so aggregating information and sharing it is what I do. I hope this helps. ❤️

EDIT: If you have additional resources you’d like to share, please feel free to reach out or leave a comment. Thanks!

Organizations

If You Only Read One Thing

Resources

Articles and Bibliographies

Podcasts and other Media

Crowing Rooster Pillows

I hesitated when Countess Laurel Gwen, Meridies, put out the call for participants in a medieval effigy project. My concerns about my own participation were related to cultural appropriation – because I’d be not only showcasing the material culture of a culture that I have no personal ties to, and which my own ethnicity/nationality (White American whose ancestors immigrated from Europe before the Revolutionary War) have a history of marginalizing, but also recreating an image of that culture’s burial practices. After some research into those practices and conversations with trusted SCAdians who belong to this culture, I decided to go ahead.

Enter the roosters.

The 鸡鸣枕, ji ming zhen, or “crowing rooster pillow” is often seen in Chinese burials from the SCA period. The Yingpan man’s head rests on one, and we have examples of these pillows from the Eastern Han Dynasty through the Tang Dynasty. I had decided to try and stick to the Astana finds in Turpan (link goes to an image of one of the mummies with might be a reconstructed pillow), so I knew I had to make a rooster pillow.

Since this was a side project while I was prepping for my vigil and elevation, I didn’t dive as deep as I eventually will into this particular item and use in Han Chinese death practices during the Tang Dynasty. I dug around and looked at images and tried to recreate something that looked and functioned like what I saw, using materials and methods I knew to be known and used in that period. (Sadly, this appears to be one of those topics that doesn’t have any good English-language articles/write-ups, which means the research will be slow-going.)

The extant pillows I can find vary in shape, but all have a similar silhouette – two heads, joined pushmi-pullyu style onto one body. Many of the extant pillows have coxcombs and waddles, though some do not. It’s difficult to say if these smaller pieces of silk were absent, or just deteriorated and separated from the main body of the pillow.

 The Ming Pillow of the Eastern Han Dynasty unearthed from the Niya Husband and Wife Tomb in Minfeng County in 1959 (pictures provided by the Xinjiang Uygur Autonomous Region Museum)
A pillow from the Eastern Han Dynasty, unearthed from the Niya husband and wife Tomb in Minfeng County in 1959 (picture by the Xinjiang Uygur Autonomous Region Museum).
A crowing rooster pillow from the Jin Dynasty (266-420 CE).

I still have some of the 24″ wide brocade I used for my banbi, so I decide to use some of it for my rooster. After sketching out a basic shape, adjusting for stuffing deterioration, I cut out two pieces from the brocade for the sides of the rooster, and a third gusset piece for the bottom, since so many appear to be able to sit flat. This also allows for more stuffing to be put into the pillow.

I sewed the pieces together with a backstitch, and used some green felted wool for the comb, held within the seam. I also made two tassels out of yellow silk embroidery floss and inserted it so that it would hang from the end of the beak, like some of the extants show. After it was sewn up, I turned it right-side out and ironed it. I have what feels like a bottomless bag of Tunis wool that was given to me years ago, which I used to stuff the pillow. Once stuffed, I turned in the edges of the opening and stitched it closed.

After the pillow aspect of the rooster was done, I focused on embellishment. My rooster needed eyes and a waddle. Going off of the Jin Dynasty extant, I used yellow silk and jade beads for the eyes, and yellow silk and green silk for the waddle, which were half circle pieces.

This was a fun project, because aside from the green wool (I don’t have really any wool), everything I used was already in my supply/scraps bin – and most of it was scraps. The whole thing came together in only a couple of days, and if I had chosen to start it on a weekend, I probably could have easily finished it in one day.

So now I have a crowing rooster pillow, which I’m fully expecting my smallest child to try and claim as her own.

She thinks it is a dragon.

You can watch the Medieval Effigy Project video below. Enjoy!

The Layers of Elevation

Note: It’s taken a year to get this post finished, but 2020/2021 were pretty dense as far as years ago. Regularly scheduled content will continue soon!

Continuing with the analog of a scholar passing examinations and taking an official post, I wanted my elevation clothing to stand in contrast to the simple, un-dyed linen robe I wore for my vigil.

Quick note: this is an image-heavy post, but rather than intersperse the images, I’m going to put them all in a gallery. Enjoy!

Scholars who would travel to Chang’an (the capital city of the Tang Dynasty) to for the annual conferrals of jinshi degrees, the final and highest degree in the civil exam framework (sound familiar?). This group was recognizable by the plain hempen robes they wore – and were called mayi (hemp-clad), buyi (cloth-clad), or baipao (white-robed).1 The word jiehe (“doffing of the coarse clothes”) described the occasion when scholar was assigned to an official post. High-ranking officials were called “vermillion-robed” (fifth rank or above) or “purple-robed” (third rank or above).

I also wanted to find a way to incorporate the SCA tradition of the laurel cloak.

I’ve already talked about the inspiration for my elevation robes, but here’s a quick review: The Chinese Historical Costume Restoration Team did a photoshoot of a recreation of an outfit worn by one of the donor ladies in Mogao Cave 9/Grotto 167, which is what I based my elevation ensemble on. It consists of three shirts (襦, rū) with incrementally larger sleeves, a skirt, a shawl, and shoes. (I cover the accessories and hair in other posts.)

I knew I wanted a red skirt as a nod to the “vermillion-robed” officials, and Mistress Maudelyn kindly dyed silk gifted to me by Lady Wilhelmina de la Coste. My skirt band was a gift from my laurel, Mistress Una.

I used my large-sleeved gown (da xiu shan, 大袖衫) pattern for the sleeves. I’m pretty sure when the sumptuary laws (as ineffective as they may have been) talk about sleeve width, they’re meant to curb the opulence of these sleeves. I also adjusted the sleeves so that the inner shirt’s sleeves were slightly longer, which would ensure they peaked out from beneath the teal and darker blue. I kept the body length short, so the only true “gown” in this ensemble is the laurel cloak Una made for me.

My inner-most shirt, dyed with the wax-resist method.

I spent a hot day in July with Mistress Wuennemon and Mistress Nula dying the fabric for my inner gown and shawl. We used a wax-resist method for the gown and a clamp-resist for the shawl. Countess Laurel Gwenhwyvar verch Owen ap Morgan made the blocks for my shawl, and they were so big we had to use a kiddie pool for the dye bath. I didn’t get a chance to go back and stamp stars on the ponies, and I’m not sure if I will. We also learned that batik and a hot dye bath aren’t a great combination, but I was still happy with our results.

Mistress Una made my laurel cloak, which is the large-sleeved gown (da xiu shan, 大袖衫). It’s a thin white silk with hand-printed gold laurel wreaths.

  1. Feng, L. R. (2015). City of marvel and transformation: Changan and narratives of experience in Tang Dynasty China. (Ebook). Honolulu: University of Hawaii Press.

Scholarly Vigil Robes

My entire vigil and elevation was planned around the concept of someone passing their civil exams in order to take a position as an official within the imperial bureaucracy. For me, my elevation to the order was as much if not more so about the new role that I was taking on, in addition to the honor of the accolade itself. I found the scholar to official journey to be a good analog for this transition.

It’s not uncommon for someone’s vigil robes to signify contemplation or cleansing before their vigil. White is commonly seen in vigil garb and, across cultures, is associated with solemnity (it is the color of mourning in many eastern cultures) religious sanctity, and purity.

Scholars who would travel to Chang’an (the capital city of the Tang Dynasty) to for the annual conferrals of jinshi degrees, the final and highest degree in the civil exam framework (sound familiar?). This group was recognizable by the plain hempen robes they wore – and were called mayi (hemp-clad), buyi (cloth-clad), or baipao (white-robed).1 The word jiehe (“doffing of the coarse clothes”) described the occasion when scholar was assigned to an official post. High-ranking officials were called “vermillion-robed” (fifth rank or above) or “purple-robed” (third rank or above).

I wanted to follow this same narrative of transformation and accepting of a post, along with the colorless, un-dyed hemp robes as a symbol of anticipation of a new identity, especially since the metaphor of transformation was prevalent in literature of the time when discussing this event in someone’s life2.

I used lightweight, natural linen to make my scholar’s robes, which I based off the yuán lǐng páo 圓領袍 (圓領袍, “round-collared robe”) that was worn by men regardless of rank or status – the only sumptuary prescriptions on them were length, fabric, and color 3.

My first attempt at a yuán lǐng páo.

Before I cut into my un-dyed linen, I used some red cotton that I had been given to make a prototype. I’d only made one other robe before this, out of black quilting cotton, as a way to test the layers and closures, and to learn things.

I used similar construction “rules” when patterning my yuán lǐng páo – a center back seam, no shoulder seam, attached collar, sleeves, and cuffs. Because the robe closes with a button and loop at the collar, there are two panels sewn to the center front, one for each side, which curve to match the neckline and overlap with each other. Since this wasn’t intended as a high-class garment, I kept the sleeve width narrow. I also made a cross-collar undershirt (裋褐, shùhè) to wear with the robe, as the under layer’s collar can often be seen beneath the rounded collar. I chose to purchase linen pants to finish out the outfit, since I haven’t prototyped proper Tang Dynasty pants yet. I also purchased boots from Taobao via Bhiner.

To draft my robe, I took the following measurements:

  • A: edge of neck to hem (knee)
  • B: shoulder point to cuff
  • C: chest circumference (bust)
  • D: neck circumference
  • E: waist
  • F: shoulder point to hip, over bust
  • G: back of neck to shoulder
  • H: back of neck to collarbone/collar
  • I: shoulder to waist, over bust

In a modern, fitted garment, the length measurements (like A, F, and I) would be different for the front of the garment versus the back, because of the bust. But this robe is seen in art bloused at the waist – pulled out a bit so that it hangs – so I wasn’t concerned about extra fabric at the back.

The pattern consists of seven pieces in total, several of them mirrors of one another: two body panels, two front panels, two sleeves, and one collar. I chose not to line my robe, but if I had or ever do in the future, I believe that flat-lining it would be the best option. I also kept the sleeve one piece instead of adding an extra cuff, though that is something I could certainly do in the future.

Diagram of my robe. Click to embiggen.

To assemble my robe, I first stitched the center back seam together, then joined the sleeves to the body panels. Next I stitched the front panels into pairs (center front to center front), then stitched to the body panels. I then hemmed the sleeve cuffs and the edges of the front panels. I had to tweak the front panels a bit so that they would properly align with the curve of the collar, but that wasn’t difficult. I attached the collar (a single piece of rectangular fabric) by first stitching it on with right-sides together, then pressing it up and folding it down toward the inside, then pressing the inside edge up and hand-sewing it so that it covers the seam. I left the ends open so that I could attach loops made from simple tubes of fabric sewn and turned, and I used my dress form to determine where to attach the fabric buttons. Lastly, I stiched the side seams and sleeves closed, adding a set of ties at waist level to hold the inner front panel closed. I finished all my seams by flat felling and stitching them down with a slip stitch.

Once I had my red prototype done, I set about making another robe out of my natural linen.

For the shirt, I used my basic shirt pattern but adjusted the front panels so that it would be a cross-collar shirt instead of parallel. I had to make some adjustments once I had it sewn up to accomodate my bust, and I’m still not really happy with how the collar lays. I want to do some more experimenting with this before I finalize my pattern, and I also feel that the collar could stand some interfacing to help it lie flat. In period, this could have been an additional layer(s) of (perhaps coarser) fabric like horsehair. The waist ties are attached at the side seams and the ends of the collar pieces, which I also need to do more experimenting with in order to get them positioned so that the panels lay nicely across the chest.

I had some pretty intense thread-chicken moments.

To belt my robe, I used the legacy apprentice belt I was given by my Laurel, and originated with Master Allan of Moffat.

Illustration by 逆名 [blog] of various cloth headwear, and their more structured derivatives.

The term (jīn, cloth) is a broad term for cloth headwear. The basic headwear for masculine dress in the Tang Dynasty was the 幞头 (fú tóu, cloth turban). A stiffened, woven basket provided more structure and helped maintain shape once the cloth was tied on. I used a piece of black linen from my stash, X by Y, and hemmed all the edges. In future, I’d like to make a fú tóu using a lighter weight linen cloth, or a lightweight silk.

Me, along with my Laurel Mistress Una Bardsdottir and Mistress Wuennemen, who looked amazing in their ruqun, at my vigil.
  1. Feng, L. R. (2015). City of marvel and transformation: Changan and narratives of experience in Tang Dynasty China. (Ebook). Honolulu: University of Hawaii Press.
  2. Ibid.
  3. Benn, C. (2002). Daily life in traditional China: The Tang Dynasty. Westport, CT: Greenwood. p. 100

Elevation Bling – Accessory Artisan Appreciation

Some incredibly kind and gifted artisans made the various hair jewelry and accessories that I wore for my elevation.

My elevation mask, painstakingly painted by Seong Myeong Su Daegam Daesaseong.

The incredibly talented (and recently elevated!) Seong Myeong Su Daegam Daesaseong painted the red silk fabric that would become my face mask, based on a piece of embroidered silk from the Tang Dynasty featuring florals and ducks. She used the same technique she used for the rank badges on her danryeong. I highly encourage you to read more about her work over at Gold and Jade.

Her Excellency Caterina Angelique Coeur Noir made me a wonderfully repousse brass comb that served as my central hair accessory. It features a dragon (which is in my badge) and some pearled osmanthus flowers. She doesn’t have an SCA blog, but you can see her work on Facebook.

Comb by Her Excellency Caterina Angelique Coeur Noir

The Honorable Lady Sara al-Garnatiyya etched the two side combs and attached them to pre-made teeth, designing them to serve as complements to the central comb. You can see more of her metal and enamel work on her blog.

Combs by The Honorable Lady Sara al-Garnatiyya

Countess/Laurel Gwenhwyvar verch Owen ap Morgan (Northshield) made the wonderful hairpins that Mistress Una Barthrsdottir, Mistress Wuennemon die Naehrin, and Countess Aelfgifu Haraldsdottir put in my hair as part of my ceremony. I wanted to include this as a nod to the hair-pinning ceremonies that marked a new stage of live for women during the Tang Dynasty. It also meant that These large pins were meant to mimic the array seen in the donor portraits I was mimicking for my elevation outfit. She created a mirrored set of six for me, featuring laurel leaves and a squirrel, to reference my heraldry. Countess Gwen also made my peerage banner, which was a total surprise to me. You can see her work on her Patreon and on Facebook.

My amazing banner by Countess-Laurel Gwen (NS flavor). Photo courtesy of CL Gwen.

I am so incredibly thankful to all of these lovely artisans for making things for me to use during my elevation, and that enhance my overall wardrobe. They are all excellent people, and I encourage you to check out their other work.

I’ve got two more posts regarding my vigil and elevation in the queue – each about the clothing I wore for my vigil and elevation, respectively. We will be back to the usually expected content soon!

Elevated Hair

Recreation of a Dunhuang donor portrait by The Chinese Historical Costume Restoration Team.

I knew I would need to use some false hair for my elevation in order to get the look I wanted.

Quick recap – Tang Dynasty ladies loved elaborate, up-do hair styles that often called for padding or false hair (called “adopted hair”) to achieve the looks we see in statuary, murals, and paintings. For a more detailed look at the three basic kinds of hairdressing (hair, false hair, and headdresses), Zhang Jianhin’s essay in The Tomb of Li Chui is a good place to start. For images of modern recreations of these hair styles, see Hair Fashions of Tang Dynasty Women, by He, Jian’guo (何建國) or this guide to recreating historic Chinese hairstyles.

I even found a tutorial on BiliBili, China’s largest video-sharing platform (like YouTube), but when I sat down to try and make it, I was a million thumbs. I couldn’t get the hair to behave at all the way that the person in the video did, and I was getting really frustrated.

That’s when Phaedra de Vere came to my rescue. She offered to make it for me, and I gratefully accepted, sending her money and measurements and crossing it off my list, knowing that I was in good hands.

Phaedra made the hairpiece out of wire and hair donuts, covering it with layers of faux wefts color matched my (current) hair color (Arda CL-070).

The hairpiece’s bones – hair donuts that have been cut and put onto a wire frame.
No description available.
The finished hairpiece, with hair nets to fight flyaways.
No description available.
The guts of the hairpiece – space enough for me to tuck a bun into it, with an arrow indicating the front.

She’s absolutely stunning. Heavy – but stunning! And aptly now named “Phae” in honor of her creator.

Me, during the elevation ceremony. Picture courtesy Sir Conal MacDale

I’ll be writing another post about the various accessories I wore in my hair, courtesy of some truly awesome artisans.

Socks, of the Un-Fancy Variety

I’ve been contemplating Tang Dynasty socks for about a year now, and earlier this summer I finally knocked out a pair that fit me. I did my best to measure my foot in order to get the right size, looking at extant socks from the 8th century (and prior) and Seong Myeong Su’s instructions for Beoseon Socks (Korean).

My first few attempts ended up being too small to wear comfortably, particularly around the bridge of my foot.

Treasure Details - Shosoin - Imperial Household Agency
Pair of socks for Fuefuki (piper) player of Kuregaku (dance and music), No. 75, in the Shosoin Repository. Made of nishiki (colorful patterned weave silk) on purple ground. Lined with white plain weave silk.

The design of the sock is simple enough, with the top seam of the sock cut on the bias, a split at back of the ankle, and a pair of ties to secure the sock on the foot. The Shosoin Repository has two styles of socks – some shorter, and some taller socks presumably intended to be worn with boots. My plan is to wear these with my elevation shoes, since I need a thicker sock to make my boots fit.

I cut my socks out of lightweight linen and used a backstitch to sew the two pieces together, right-sides out. I turned down the top edge and the edges of the ankle split and sewed them with a slip stitch. I trimmed the seams and turned the wrong-side out and ironed the sock before stitching the seam again to enclose it. Since the seam runs down the middle of my foot, I wanted to make sure it was adequately protected from wear.

I made the ties the same way I made the ties for my banbi, only smaller, and attached them the same way as well.

Finished socks with ties.

Knowing vs. Being Skilled – Go

As I have been making notes and brain maps and other such things on Chivalric/Christian virtues, Admonitions of Peerage, Judaic ethical concepts, and the Five Constants of Confucianism, I’ve been thinking a bit about peerages in general.

Remember this bit of Corpora?

They shall have made every effort to learn and practice those skills desirable at and worthy of a civilized court. To this end they should have some knowledge of a wide range of period forms, including but not limited to literature, dancing, music, heraldry, and chess, and they should have some familiarity with combat as practiced in the Society.

SCA Governing Documents, VIII.A.1.g. [Source]

See that! CHESS!

Nobody said you had to be good at chess. Just knowledgeable and, well, practiced. I’ve never been a good chess player. I’m bad at that sort of spatial reasoning, and I have a hard time thinking several moves ahead. I enjoy chess, but as a casual player.

But as someone who has spent the last four-ish years eye-deep in the Tang Dynasty, playing chess doesn’t really fit. But playing Go does! And Go is pretty much chess. It’s about territory control and capturing enemy pieces to score points.

And I’m not good at it.

There are some excellent videos out there that walk you through the basics of a Go game and can help you wrap your head around the concepts. But understanding how a game is played and being a “good player” are two very different things.

We played Go in the Extra-European Salon at the Meridian Grand Tournament in September, and I was so very thankful that someone who was much more knowledgeable about the game helped me think through moves and played a few games with us. He recommended using puzzles to help hone your skill. I feel like I’d have to do a lot of puzzles to hammer the trickier concepts into my head, but hey – that’s Go.

There is also a free app that I have played now and again, but I’m still heavily reliant on the hint button. [Here is a list of iOS apps.]

This is one of those things that I’ll get better with in time, which means making an effort to play a bit on my phone every day, or carting around my 9×9/13×13 board and bags of stones. Maybe I’ll make a small 9×9 board on a piece of fabric and bug people at events to play with me. Maybe.

Throwing arrows at a pot is a different kind of fun, and totally a worthy and desirable skill in the upper echelons of the Tang Dynasty. (Psst. You can see a pot with its arrows in the back of a scene of scholars playing Go with Li Wei painted on a screen. But it’s a game of skill, not strategy. And involves more wine.

I’m working on some class notes for Tang Dynasty Games, which I’ll be teaching at Magna Faire – hope to see you there!

A Tale of Two (Linen) Skirts

Two linen skirts, both comparable in dignity.

I have two Tang Dynasty skirts made of linen. One is pretty pastel pink-and-purple. The other is kick-you-in-the-face orange.

The pink skirt is a split skirt, meaning that it is two panels pleated to bands with ties that are seamed at the sides, with a gap at the top so that it can be wrapped around the wearer’s waist and tied.

My pink skirt, looking kind of orange and in need of an ironing before I wear it again.

The orange skirt is a single-panel wrap skirt. It’s still a panel pleated to a band, but it is one long panel – long enough to wrap around the wearer 1.5 times, with ties at each end. It’s worn very similarly to a modern wrap skirt.

So. Much. Orange.

Here’s a (cued) video showing how to wear both kinds of skirt. (I can’t speak to the two-toned tie method’s period accuracy, since I haven’t seen ties in paintings that look like they are two colors, but it sure looks cool!)

Before I launch into the specifics regarding these two styles of skirt when they are made of linen, let’s talk about wrap and split skirts during the Tang Dynasty. The extant skirt we have from the Song Dynasty 1 and the doll-sized skirts from the Tang Dynasty 2 all appear to be of the single-panel wrap variety; however, we have some pictorial evidence of split skirts.

Detail of A Palace Concert, potentially showing evidence for the two-panel style skirt 3

Two ladies on the right side of the table in A Palace Concert appear to have split skirts, perhaps with a secondary skirt worn beneath. The lower lady, wearing a pale pink printed shirt and a pale skirt with a green tie. Deciphering what we are seeing here is a little rough, not only due to the degradation of the painting. It is possible that the split in the paler fabric of the skirt is instead the hanging piece of the lady’s skirt tie, but given the position at her underarm and the way the skirt folds move around it makes me question that theory.

Like the lady below her, the flute-player’s pale skirt is divided at the side to reveal a triangle of red fabric with some sort of design. She is also wearing a red pibo, but the shawl clearly flows down her back and across her chest as opposed to under her arm. Even if it was tucked inside her skirt’s waistband, which we occasionally see in other images, the fact that we can see it would still stand as evidence of a two-panel skirt.

In addition to A Palace Concert, ladies on the north wall of Mogao Cave 107 are wearing two skirts, the top-most of which has a very deep split.


Detail of mural on the north wall of Cave 107, showing split-style skirts, as well as skirts with horizontal stripes.4

So to the question of which is more period, there might be a distinction to be made between the two styles of skirts based on region or a narrower time period, given the fluctuation of fashion during the Tang Dynasty, but I haven’t yet dug that far to find/make that distinction. Cave 107 is dated to late Tang (827-859), while the A Palace Concert is anonymous, making it more difficult to date.

I (usually) wear linen skirts at events where I am chasing small children, because small children don’t understand that sticky applesauce or banana hands on Mama’s silk is a bad idea. But I learned something about linen skirts when I wore the orange one at Known World Costume and Fiber Arts in Georgia this summer – single panel wrap linen skirts with linen ties do not want to stay up.

This is possibly and very likely due to the weight of the linen and the way the linen-on-linen ties act. Silk is stronger, and has a bit of tooth compared to linen that helps it grip. My very first Tang Dynasty skirt had bias cut silk ribbon ties, but they weren’t heavy enough and were too slick to do the job, so my subsequent skirts had either poly-satin ribbon ties (which is fine in a pinch) or ties I made myself out of fabric tubes or folded and stitched silk.

The pink, two-panel split skirt has never slipped the same way that the orange one did. I think it’s because the weight of the skirt is split between two sets of ties. Also – in my experience, if you want to embrace the cleavage-y aspect of Tang Dynasty clothing, go with silk. My linen skirts do better if they sit at the top of your chest, so that your breasts can help support the fabric, as opposed to across the middle.

Image may contain: 1 person, standing, tree and outdoor
Me, wearing the red silk skirt with the Sartor silk band that Mistress Una made for me.

The width of the ties make a difference too. I’ve noticed that my big band skirt that my Laurel, Mistress Una, made for me, tends to sag a bit at the sides. I think that if I replace the poly-satin ribbon ties with wider, silk ties (at least as wide as the band itself), I can fix this issue. As it is, the narrower ties are secured at the top of the band, meaning that the bottom of the band sags.

If you compare the photo above to the photo below, where I am wearing a skirt with a thinner waistband, the silk ties are in better proportion to the waistband, and do a much better job at… well, their job. (These are both two-panel skirts, by the way).

Image may contain: 2 people, people standing, stripes, child and outdoor
Me in my stripey split panel silk skirt.

The next few events on my docket are sans children, so I think I’ll tackle the Sartor skirt first in terms of fixing stuff. Then I can figure out how to best turn a the orange wrap skirt into a split skirt, so that I can wear it around a toddler without fear of malfunction.

  1.  Zhou, X.; Gao, C. (1987). 5000 years of Chinese costumes. Hong Kong: The Commercial Press. p. 123.
  2. Chen, B. Y. (2013). Dressing for the times: Fashion in Tang Dynasty China (618-907). (Doctoral dissertation). Retrieved from Academic Commons. (doi: 10.7916/D8KK9B6D). p. 92.
  3. “唐人宮樂圖 (A Palace Concert).” (618-907). National Palace Museum. Retreived from https://theme.npm.edu.tw/selection/Article.aspx?sNo=04000957&lang=2.
  4. “Mogao Grottoes Cave 107.” Digital Dunhuang. Retrieved from: https://www.e-dunhuang.com/cave/10.0001/0001.0001.0107.